Are you tired of spending hours manually watering your garden? If so, then it’s time to consider building your own DIY irrigation system. In this article, we will show you step by step how to create an efficient and cost-effective irrigation system for your garden. Say goodbye to wilted plants and hello to a lush, thriving garden with this easy-to-follow guide. So grab your tools and let’s get started on transforming your garden into a haven of greenery and beauty.

Choosing the Right Irrigation System
Determine Your Garden’s Watering Needs
When choosing an irrigation system for your garden, it’s important to first determine its specific watering needs. Consider factors such as the size of your garden, the type of plants you have, and their water requirements. Different plants have different watering needs, so it’s crucial to understand how much water each plant needs and how often they should be watered. By evaluating your garden’s watering needs, you can choose an irrigation system that provides the right amount of water for your plants without wasting any resources.
Evaluate Various Irrigation Options
There are several irrigation options to choose from, including drip irrigation, sprinkler systems, and soaker hoses. Each option has its own advantages and disadvantages, so it’s important to evaluate them carefully. Drip irrigation is ideal for plants that require a slow, steady water supply at their roots, while sprinkler systems are better suited for larger areas and provide a more widespread water distribution. Soaker hoses, on the other hand, deliver water directly to the soil, minimizing water loss due to evaporation. Consider the specific needs of your garden and choose the irrigation option that best suits your requirements.
Consider Factors like Budget and Water Source
It’s important to consider your budget and the availability of water sources when choosing an irrigation system. Some systems may require a larger upfront investment, but they may also help save water in the long run. Additionally, take into account the type of water source available for your garden. If you have access to a reliable water source, you may opt for a system that connects directly to a water supply. However, if water is scarce or expensive, you may consider alternative options such as rainwater harvesting or using recycled water. By considering these factors, you can choose an irrigation system that fits your budget and water availability.
Gathering the Necessary Tools and Materials
Basic Tools Required
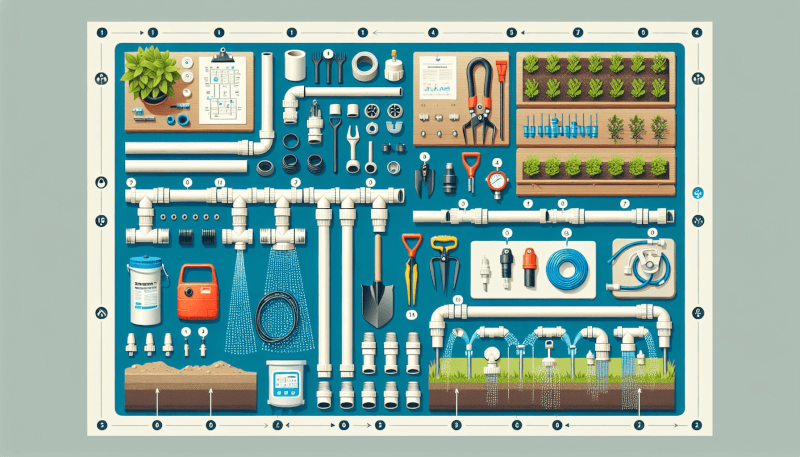
Before you start building your DIY irrigation system, it’s important to gather all the necessary tools. Some basic tools you may need include a shovel, a measuring tape, a utility knife, a tubing cutter, and pliers. These tools will help you with various aspects of the installation process, from digging trenches to cutting and connecting tubing.
Materials for Irrigation System
In addition to the basic tools, you’ll also need certain materials to build your irrigation system. These materials may include drip tubing, connectors, emitters, sprinkler heads, valves, and various fittings. The specific materials you’ll need will depend on the type of irrigation system you choose. Make sure to gather all the necessary materials before starting the installation process.
Optional Accessories for Automation
If you’re looking to automate your irrigation system, there are a few optional accessories you can consider. These may include a timer or irrigation controller, a rain sensor, and even smart irrigation options that can be controlled through mobile apps or integrated with smart home systems. While these accessories are not essential for a basic irrigation system, they can greatly enhance the convenience and efficiency of your watering routine.

Designing Your Irrigation Layout
Measure and Map Your Garden
Before designing your irrigation layout, it’s crucial to accurately measure and map your garden. Take measurements of the entire area, including any existing or planned garden beds, pathways, and other features. Use a graph paper or computer software to create a scaled map of your garden. This will help you plan the irrigation system more effectively, ensuring proper coverage and water distribution.
Decide on Water Source and System Type
Once you have a clear map of your garden, you need to decide on the water source and the type of irrigation system you want to install. Consider whether you’ll be connecting the system to a water supply or if you’ll be using alternative water sources such as rainwater harvesting. Additionally, based on your garden’s watering needs, choose the appropriate system type, such as drip irrigation, sprinkler system, or a combination of both.
Plan for Pressure Regulation and Water Flow
When designing your irrigation layout, it’s important to plan for pressure regulation and water flow. Different plants and irrigation components require specific water pressure and flow rates. Ensure that your system includes pressure regulators and flow control valves to adjust and maintain the optimal water levels. Proper planning for pressure regulation and water flow will help prevent damage to the plants and ensure efficient water distribution.
Installing the Water Supply System
Locate and Dig a Water Source
If you’re connecting your irrigation system to a water supply, the first step is to locate and dig a water source. This could be a faucet, a hose bib, or even a dedicated water line. Ensure that the water source is easily accessible and can provide sufficient water pressure and flow for your irrigation system.
Set Up the Main Supply Line
Once you’ve located the water source, you’ll need to set up the main supply line. This line will carry water from the source to the rest of the irrigation system. Depending on the length and complexity of your system, you may need to use PVC pipes, polyethylene tubing, or other suitable materials to set up the main supply line. Ensure that the line is properly connected to the water source and securely fastened to the ground to prevent any leaks or movement.
Add a Backflow Preventer and Water Filter
To maintain the quality of your irrigation water and prevent any potential contamination, it’s essential to install a backflow preventer and a water filter. A backflow preventer ensures that water flows in only one direction, preventing any backflow of contaminants into the water supply. A water filter helps remove any sediment or debris from the water, ensuring that it’s clean and free of clogging agents. Install these components in the main supply line to protect your irrigation system and promote the health of your plants.

Assembling Drip Irrigation Lines and Emitters
Select Drip Tubing and Emitters
For drip irrigation systems, the next step is to select the appropriate drip tubing and emitters. Drip tubing is available in different sizes, lengths, and materials, so choose the ones that are suitable for your garden’s layout and water requirements. Emitters control the flow of water through the tubing and are available in various types, such as drip emitters, micro sprays, and bubblers. Consider the specific needs of your plants and choose emitters that provide the right amount of water for each plant.
Cut and Connect Tubing Sections
After selecting the drip tubing, you’ll need to cut it into appropriate lengths and connect the sections to create a layout that covers your garden adequately. Use a tubing cutter to make clean, straight cuts without causing any damage to the tubing. Connect the sections using appropriate connectors and fittings, ensuring a secure and leak-free connection. Properly assembling the drip tubing will ensure that water is distributed evenly throughout your garden with little to no wastage.
Install Emitters and Punch Holes for Plants
Once the drip tubing is connected, it’s time to install the emitters and punch holes for your plants. Attach the emitters at appropriate intervals along the tubing, ensuring that they’re positioned near the plants. Some emitters may need to be inserted directly into the soil, while others can be mounted on stakes or other support structures. Use a hole punch tool to create holes in the tubing where you want to place your plants. This will allow water to flow directly to the roots, providing efficient irrigation.
Installing Sprinkler Heads and Irrigation Valves
Identify Optimal Sprinkler Locations
If you’re incorporating a sprinkler system into your irrigation setup, it’s important to identify the optimal locations for sprinkler heads. Consider the layout of your garden and the specific watering needs of your plants. Place the sprinkler heads strategically to ensure maximum coverage and balanced water distribution. Avoid placing sprinkler heads near obstacles or structures that may obstruct their spray pattern.
Connect Sprinkler Heads to Water Supply
Once you’ve identified the sprinkler locations, you’ll need to connect the sprinkler heads to the water supply. Use appropriate connectors and fittings to ensure a secure connection. Depending on the type of sprinkler heads you’re using, you may need to attach them directly to the main supply line or use risers or swing joints for proper positioning. Ensure that all connections are tight and leak-free to avoid any water wastage.
Install Zone Valves and Connect to Controller
To control the water flow to different areas of your garden, it’s important to install zone valves in your irrigation system. Zone valves allow you to divide your garden into separate watering zones and control them independently. Connect the zone valves to the main supply line and make sure they’re properly secured. Finally, connect the zone valves to the irrigation controller, which will enable you to program and automate the watering schedule for each zone.

Setting Up a Timer or Irrigation Controller
Choose the Right Controller for Your System
When setting up a timer or irrigation controller, it’s crucial to choose the right one for your system. Consider factors such as the number of watering zones, the type of irrigation system, and the desired level of automation. There are various types of controllers available, ranging from basic timers to advanced smart controllers that can be connected to mobile apps or smart home systems. Select a controller that meets your specific needs and is compatible with your irrigation system.
Connect Controller to Water Source and Valves
Once you’ve chosen the controller, you’ll need to connect it to the water source and the zone valves. Some controllers may require an electrical connection, while others may operate on battery power. Follow the manufacturer’s instructions to connect the controller properly, ensuring that there are no loose connections or exposed wires. Additionally, connect the controller to the zone valves, allowing it to control the water flow to different areas of your garden.
Program the Controller for Timed Irrigation
After the controller is connected, it’s time to program it for timed irrigation. Set up watering schedules for each zone based on your plants’ watering needs. Consider factors such as the type of plants, the prevailing weather conditions, and any specific water restrictions in your area. Most controllers allow you to set multiple programs, enabling you to customize the watering schedule for different days or times of the week. Take advantage of these features to optimize the water usage and ensure that your plants receive the right amount of water at the right time.
Adding Automation and Remote Control
Consider Smart Irrigation Options
For added convenience and efficiency, consider incorporating smart irrigation options into your system. Smart irrigation controllers can connect to your home’s Wi-Fi network and be controlled through mobile apps or even voice commands if integrated with smart home systems. These controllers often come with features like weather-based irrigation, which automatically adjusts the watering schedule based on local weather conditions, saving water during periods of rainfall. Explore the different smart irrigation options available and choose one that suits your needs and preferences.
Install Sensors for Weather-Based Control
To enhance the automation capabilities of your irrigation system, you can install various sensors that provide real-time data for weather-based control. Weather sensors can monitor rainfall, temperature, humidity, and other environmental factors to ensure that your irrigation system responds effectively to changing weather conditions. By incorporating these sensors into your system, you can avoid overwatering during rainy periods and adjust the watering schedule accordingly, saving both water and money.
Connect to Mobile Apps or Smart Home Systems
To have remote control over your irrigation system, consider connecting it to mobile apps or integrating it with smart home systems. Many smart irrigation controllers offer dedicated mobile apps that allow you to monitor and control your system from anywhere. This provides the convenience of adjusting your watering schedule, activating or deactivating zones, and receiving alerts or notifications about your system’s performance. Additionally, integrating your irrigation system with smart home systems can enable voice control and automation based on other connected devices in your home.

Testing and Adjusting the System
Check for Leaks and Proper Watering
After installing and setting up your irrigation system, it’s important to thoroughly test it for leaks and proper watering. Turn on the water supply and carefully inspect all connections, valves, and emitters for any signs of leakage. Fix any leaks promptly to avoid water wastage. Additionally, ensure that the water is being distributed evenly to all plants and that the desired watering coverage is achieved. Make any necessary adjustments to achieve optimal water distribution and avoid overwatering or underwatering.
Adjust the Watering Schedule as Needed
Once the system is tested and running smoothly, it’s crucial to monitor its performance and adjust the watering schedule as needed. Observe your plants’ response to the irrigation system and make changes based on their specific needs. Factors such as seasonal variations, plant growth, and weather conditions may require adjustments to the watering frequency or duration. Continuously evaluating and fine-tuning the watering schedule will help ensure healthy plant growth and efficient water usage.
Monitor and Maintain the System Regularly
To keep your irrigation system in excellent working condition, it’s important to regularly monitor and maintain it. Inspect the system for any signs of wear and tear, such as damaged tubing or clogged emitters, and replace or clean them as necessary. Clear any debris or obstructions from sprinkler heads to ensure proper water distribution. Regularly check the functioning of the controller and sensors, and update any software or firmware if required. By conducting routine maintenance, you can extend the lifespan of your irrigation system and ensure optimal performance for years to come.
Expanding the Irrigation System
Extend the System to Additional Garden Areas
If you find the need to expand your irrigation system to cover additional garden areas, it’s important to plan and execute the expansion carefully. Consider the specific watering requirements of the new areas and make sure your existing water source and system can handle the additional demand. Extend the main supply line and branch off with appropriate connectors and fittings to ensure proper water distribution to the additional areas. By expanding your irrigation system correctly, you can maintain consistent and efficient watering throughout your entire garden.
Add Multiple Programmed Zones for Customization
To achieve greater customization and efficiency, you can add multiple programmed zones to your irrigation system. This allows you to group plants with similar watering needs together and water them separately from other areas. By separating zones, you can fine-tune the watering schedule based on specific plant requirements, even if they differ significantly from other areas of your garden. Adding multiple programmed zones enhances the accuracy and effectiveness of your irrigations system, promoting healthy plant growth and conserving water resources.
Include Rainwater Harvesting and Recycled Water
To further reduce your reliance on traditional water sources and conserve water, consider incorporating rainwater harvesting and recycled water into your irrigation system. Rainwater can be collected from gutters, rooftops, or specially designed catchment areas, and stored in barrels or underground tanks. This collected rainwater can then be used for irrigation purposes, reducing the demand on freshwater supplies. Similarly, recycled water from sources such as greywater systems can also be repurposed for irrigation. Incorporating these sustainable practices into your irrigation system helps conserve water resources and promotes environmental stewardship.
In conclusion, building a DIY irrigation system for your garden can be a rewarding and cost-effective project. By considering your garden’s watering needs, evaluating different irrigation options, and taking factors like budget and water source into account, you can choose the right system for your garden. Through careful planning, accurately measuring and mapping your garden, and selecting the necessary tools and materials, you can design and install an efficient irrigation layout. Whether you choose drip irrigation, sprinkler systems, or a combination of both, following proper installation techniques and consistently monitoring and adjusting the system will result in healthy plants and efficient water usage. Consider adding automation and remote control features, such as smart irrigation options and mobile app integration, to enhance the convenience and efficiency of your irrigation system. Regular maintenance, testing, and adjustments are essential to keep the system in optimal condition, and expanding the system to cover additional garden areas or incorporating sustainable practices like rainwater harvesting further promotes water conservation. By building your own DIY irrigation system, you can enjoy a thriving, well-watered garden while minimizing water waste and contributing to a more sustainable environment.


