Did you know that you can preserve the vibrant flavors of herbs for year-round use? In this article, we’ll explore some exciting and easy-to-follow DIY projects for drying and preserving herbs. Whether you’re an avid cook or simply love the taste and aroma of fresh herbs, these projects will help you create a stash of dried herbs that can be used in a variety of culinary creations. From creating your own herb drying rack to making herb-infused oils, you’ll find plenty of ideas to make the most of your herb garden and enjoy the flavors of summer all year long. So, grab your gardening gloves and get ready to embark on a journey of herb preservation!

Traditional Drying Methods
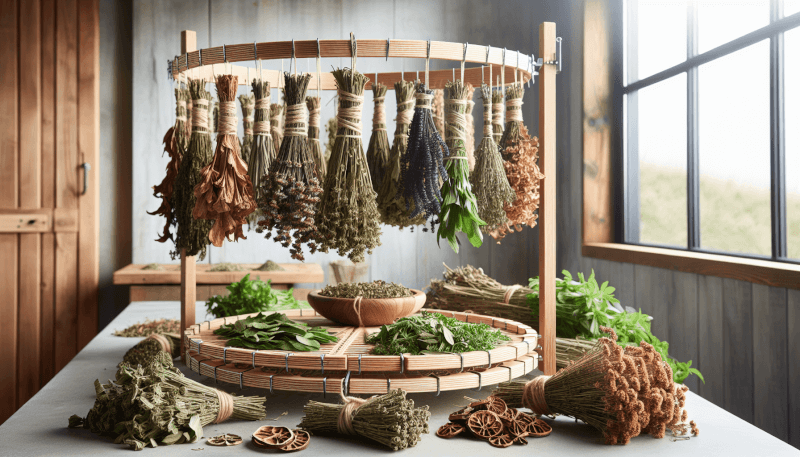
Air Drying
Air drying is one of the oldest and simplest ways to preserve herbs. To air dry herbs, start by harvesting them in the morning when the leaves are dry and the essential oils are at their highest concentration. Remove any damaged or wilted leaves and rinse the herbs gently to remove dirt and debris.
Next, gather the herbs in small bundles and tie them together with a string or rubber band. Hang the bundles upside down in a warm, well-ventilated area, away from direct sunlight. You can use a hook or a clothesline to hang the bundles. Make sure the herbs are not crowded so that they can dry evenly.
Leave the herbs to air dry for about two weeks, or until they become brittle. Once dried, remove the leaves from the stems and store them in airtight containers in a cool, dark place. Air drying is great for low-moisture herbs like rosemary, thyme, and oregano.
Hanging Bundles
Hanging bundles is another method of drying herbs that is similar to air drying. Instead of hanging individual bundles, you can tie multiple bundles together and hang them as a group. This method is especially useful for herbs with delicate stems, such as mint and basil.
To hang bundles, gather a small bunch of herbs and tie them together with a string or rubber band. Then, tie the ends of multiple bundles together to create a larger bundle. Hang the bundle upside down in a warm, well-ventilated area. The herbs will dry naturally as they hang, preserving their flavors and qualities.
Drying Racks
Drying racks are a convenient way to dry herbs without tying them in bundles. You can easily make a drying rack by placing a screen or mesh material over a frame. The herbs are spread out in a single layer on the screen, allowing air to circulate around them.
To dry herbs on a rack, remove any damaged leaves and rinse them gently. Lay the herbs on the drying rack in a single layer, ensuring that they do not overlap. Place the rack in a warm area with good air circulation, away from direct sunlight. The herbs will dry gradually over a period of one to two weeks. Once dried, store them in airtight containers in a cool, dark place.
Clothesline Drying
Clothesline drying is a convenient method for drying herbs that requires minimal equipment. To dry herbs on a clothesline, begin by washing and gently patting dry the herbs. Tie them in small bundles, as you would for air drying, and attach them to a clothesline using clothespins or clips.
Hang the herbs on the clothesline in a well-ventilated area, away from direct sunlight. Ensure that the herbs have enough space to dry evenly without touching each other. Leave them to dry for about two weeks, or until they become crispy and brittle.
After drying, remove the leaves from the stems and store them in airtight containers away from light and moisture. Clothesline drying is a great method for herbs like parsley, dill, and cilantro.
Screen Drying
Screen drying is a variation of drying racks that uses a fine mesh screen to dry herbs. It is especially suitable for herbs with small leaves, such as thyme or marjoram. To screen dry herbs, start by washing and patting them dry.
Lay the herbs in a single layer on a mesh screen, ensuring that they do not overlap. Place the screen in a well-ventilated area, away from direct sunlight. The airflow through the mesh helps the herbs dry evenly and prevents mold or mildew.
Allow the herbs to dry for about two weeks, or until they crumble easily between your fingers. Once dried, store them in airtight containers in a cool, dark place. Screen drying is a great method for preserving delicate herbs and retaining their flavors and aromas.
2. Oven Drying
Preparing Herbs for Oven Drying
Oven drying is a quick and efficient method to dry herbs, especially when time is limited. To prepare herbs for oven drying, start by washing them gently and patting them dry. Remove any damaged or wilted leaves, as well as any excess moisture.
Next, preheat your oven to the lowest possible setting, around 100-150 degrees Fahrenheit (38-66 degrees Celsius). Line a baking sheet with parchment paper or use a drying rack for better airflow. Spread the herbs on the baking sheet or rack in a single layer, ensuring they are not touching.
Drying Herbs in the Oven
Place the baking sheet or rack in the oven and leave the door slightly ajar to allow moisture to escape. This will help prevent the herbs from steaming instead of drying. Keep a close eye on the herbs as they dry, as some may require more or less time depending on their moisture content and thickness.
The drying process typically takes between one to three hours, but it can vary for different herbs. To test if the herbs are dry, touch them gently. If they crumble easily, they are ready. If they still feel slightly moist, give them more time in the oven.
Tips and Precautions
When oven drying herbs, it’s important to monitor the process closely to prevent them from burning. Some herbs, like basil, can turn dark or lose their flavor if exposed to high heat for too long. If you notice any signs of discoloration or loss of flavor, reduce the oven temperature or drying time.
Remember to keep the oven door slightly ajar to allow moisture to escape and to prevent condensation from forming. This will help ensure that the herbs dry properly and retain their flavors and aromas.
Oven drying is a versatile method that works well for a wide range of herbs. It is especially useful for herbs with high moisture content, such as mint or lemon balm. Once the herbs are dry, store them in airtight containers in a cool, dark place to maintain their quality.
3. Microwave Drying
Selecting Herbs for Microwave Drying
Microwave drying is a quick and convenient method for drying herbs, especially if you need small batches done in a short amount of time. However, not all herbs are suitable for this method, as it can cause them to lose their flavors and textures.
The best herbs for microwave drying are those with low moisture content, such as thyme, rosemary, or oregano. Herbs with high moisture content, like basil or cilantro, may not dry well in the microwave and can become mushy.
Preparation and Process
To prepare herbs for microwave drying, start by washing them gently and patting them dry. Remove any damaged or wilted leaves, as well as excess moisture. Lay the herbs in a single layer on a microwave-safe plate or on a piece of microwave-safe parchment paper.
Place the herbs in the microwave and set it to the lowest power setting. Microwave the herbs in short intervals, such as 30 seconds to one minute, to prevent them from overheating or burning. After each interval, check the herbs to see if they are dry. If not, continue microwaving them in short bursts until they are dry.
Safety Tips
When microwaving herbs, it’s important to be cautious and not overheat them. High heat can cause the herbs to become brittle or burn, resulting in a loss of flavor and quality. Microwaving herbs also produces steam, so handle the plate or parchment paper with caution to avoid burns.
Always use microwave-safe materials when drying herbs in the microwave. Parchment paper or microwave-safe plates are good options. Avoid using plastic or metal containers, as they can melt or cause sparks.
Microwave drying is a time-saving method that is best suited for drying small quantities of herbs quickly. It can be a useful technique when you need herbs in a hurry or for preserving herbs with low moisture content. Once the herbs are dry, store them in airtight containers in a cool, dark place to maintain their freshness and flavors.
4. Using a Food Dehydrator
Choosing a Food Dehydrator
A food dehydrator is an excellent investment if you plan on drying herbs regularly. When choosing a food dehydrator, consider its size, temperature control options, and airflow system.
Look for a dehydrator with adjustable temperature settings, as different herbs require different drying temperatures. Ensure that the dehydrator has a thermostat to maintain a consistent temperature throughout the drying process.
Additionally, a dehydrator with a good airflow system, such as a fan or convection feature, will help distribute the air evenly and ensure uniform drying. This is crucial for preserving the flavors and qualities of the herbs.
Preparing Herbs for Dehydration
To prepare herbs for dehydration in a food dehydrator, start by washing them gently and patting them dry. Remove any damaged or wilted leaves, as well as any excess moisture. If the herbs have long stems, you can trim them to fit into the dehydrator trays more easily.
Spread the herbs in a single layer on the dehydrator trays, ensuring that they do not overlap. Leave enough space between the leaves for proper airflow. Stack the trays in the dehydrator, following the manufacturer’s instructions.
Drying Process
Set the dehydrator to the appropriate temperature for the herbs you are drying. Most herbs dry well at temperatures between 95 and 115 degrees Fahrenheit (35-46 degrees Celsius). Start with the lowest temperature recommended and adjust as needed.
Let the herbs dry in the dehydrator for about one to four hours, depending on the moisture content and thickness of the herbs. Check the herbs regularly to ensure they do not over-dry or become brittle.
Storage Tips
Once the herbs are dry, remove them from the dehydrator trays and allow them to cool completely. Store the dried herbs in airtight containers, such as glass jars or resealable bags, in a cool, dark place. Label the containers with the name of the herb and the date of drying.
Using a food dehydrator is an efficient and reliable method for drying herbs. It allows for precise temperature control and even airflow, resulting in consistently dried herbs. With proper storage, herbs dried in a food dehydrator can maintain their flavors and qualities for an extended period.

5. Herb Drying with Silica Gel
Benefits of Silica Gel
Silica gel is a desiccant that can be used to dry herbs quickly and efficiently. It is a great option when you need to preserve the color, texture, and aroma of the herbs, as it absorbs moisture without damaging the leaves.
Silica gel is readily available online or in craft stores. It comes in small granules or packets and is typically reusable. It is a versatile drying agent that can be reused multiple times, making it a cost-effective option for herb drying.
Preparing Herbs for Drying
To prepare herbs for drying with silica gel, start by washing them gently and patting them dry. Remove any damaged or wilted leaves, as well as any excess moisture. Place a layer of silica gel in the bottom of an airtight container, such as a glass jar or a plastic container with a tight-fitting lid.
Using Silica Gel
Lay the herbs on top of the layer of silica gel, ensuring that they do not overlap. Cover the herbs completely with more silica gel, making sure to fill any gaps or spaces between the leaves. The silica gel will absorb the moisture from the herbs, drying them gently and preserving their qualities.
Seal the container tightly and leave it undisturbed for about one to two weeks. The drying time will vary depending on the moisture content and thickness of the herbs. Check the herbs regularly to see if they are dry and remove them from the container once they are crispy and brittle.
Storing Dried Herbs
Once the herbs are dry, remove them from the silica gel and gently brush off any excess. Store the dried herbs in airtight containers in a cool, dark place to maintain their flavors and qualities. You can reuse the silica gel for future herb drying projects by reactivating it according to the manufacturer’s instructions.
Drying herbs with silica gel is a quick and effective method that helps retain the colors, textures, and aromas of the herbs. It is particularly useful for drying delicate herbs that are prone to losing their qualities with other drying methods. With proper storage, herbs dried with silica gel can last for an extended period without compromising their flavors.
6. Creating Herb Infused Oils
Selecting and Preparing Herbs
Creating herb-infused oils is a fantastic way to preserve the flavors and aromas of herbs while adding a unique taste to your dishes. To start, select fresh herbs with vibrant colors and strong aromas. Common choices include rosemary, thyme, basil, and sage.
Before infusing the herbs, ensure they are clean and dry. Gently wash the herbs to remove any dirt or debris and pat them dry. Make sure they are completely dry, as any moisture can introduce bacteria into the oil.
Oil Infusion Methods
There are two main methods for infusing herbs into oil: the cold infusion method and the heat infusion method.
For the cold infusion method, place the dried herbs in a clean, sterilized glass jar. Cover the herbs with your choice of oil, such as olive oil or sunflower oil, ensuring that all the herbs are submerged. Seal the jar tightly and store it in a cool, dark place for two to six weeks, depending on the desired intensity of flavor.
For the heat infusion method, you will need a stove and a cooking pot. Heat the oil gently in the pot until it reaches a temperature around 100 degrees Celsius (212 degrees Fahrenheit). Add the dried herbs and let them infuse in the warm oil for about 30 minutes to one hour, stirring occasionally.
Storing and Using Herb Infused Oils
After infusing the herbs, strain the oil to remove any plant material. Use a fine-mesh sieve or cheesecloth to achieve a clear, smooth oil. Transfer the oil to a clean, sterilized bottle or jar, ensuring it is tightly sealed.
Store the herb-infused oil in a cool, dark place to maintain its quality and freshness. Refrigeration is recommended if you prefer to extend the shelf life. Use the infused oil to add flavor to salads, marinades, roasted vegetables, or drizzle it over pasta dishes.
Experiment with different herb combinations to create your own unique flavors. Herb-infused oils make wonderful homemade gifts and can elevate any dish with their vibrant tastes and aromas.

7. Making Herb Butters
Choosing Herbs for Herb Butter
Herb butter is a delightful way to add flavor to dishes and is incredibly simple to make. Start by selecting your favorite herbs, such as chives, parsley, tarragon, or dill. The combination of herbs is entirely customizable, allowing you to create the perfect blend to suit your taste.
Preparing Herb Butter
To create herb butter, begin by washing the herbs gently and patting them dry. Finely chop the herbs to release their flavors. In a mixing bowl, combine softened unsalted butter with the chopped herbs, using a spoon or a hand mixer to thoroughly incorporate them.
Add a pinch of salt and pepper to taste, enhancing the flavors of the herbs. For an extra kick, you can also add minced garlic or a squeeze of lemon juice. Mix well until all the ingredients are evenly distributed throughout the butter.
Storing and Using Herb Butter
To store herb butter, shape it into a log shape by placing it on a sheet of plastic wrap or wax paper. Roll the butter tightly in the wrap, twisting the ends to secure it. Alternatively, you can use small molds or ice cube trays for portion-controlled servings.
Store the herb butter in the refrigerator for up to two weeks or freeze it for longer-term storage. Herb butter is a versatile ingredient that can be used to flavor grilled meats, steamed vegetables, pasta dishes, or toasted bread.
Spread a generous amount of herb butter onto warm bread for a flavorful appetizer, or melt it over a steak for an extra burst of herb-infused richness. Get creative and use herb butter to enhance the taste of your favorite dishes.
8. Herb Vinegars and Shrubs
Choosing Herbs and Vinegar
Herb vinegars and shrubs are delightful ways to add a tangy, herbal infusion to dressings, marinades, or beverages. To start, select fresh herbs with vibrant colors and strong flavors. Popular choices include basil, thyme, rosemary, or tarragon.
Choose a vinegar that complements the herbs you have chosen. Common types of vinegar used for herb infusions include white wine vinegar, apple cider vinegar, or rice vinegar. The acidity of the vinegar helps extract the flavors and aromas from the herbs.
Preparing Herb Vinegars
To create herb vinegar, gently wash the herbs and pat them dry. Place the herbs in a sterilized glass jar, ensuring they fit comfortably. Heat the vinegar in a saucepan until it reaches a simmer, but do not let it come to a boil.
Pour the hot vinegar over the herbs in the jar, ensuring they are completely submerged. Seal the jar tightly and let it cool to room temperature. Then, store the jar in a cool, dark place for two to six weeks, depending on the intensity of flavor desired.
Making Herb Shrubs
Herb shrubs are vinegar-based fruit syrups that can be used as a refreshing addition to drinks or as a glaze for desserts. To make an herb shrub, start by following the same process for herb vinegar.
Once the vinegar has infused with the herbs, strain out the herbs and discard them. In a saucepan, combine equal parts of the herb-infused vinegar and sugar. Heat the mixture gently until the sugar has dissolved, stirring occasionally.
Remove the shrub syrup from the heat and let it cool completely. Pour the syrup into a sterilized bottle or jar and store it in the refrigerator. Use the herb shrub to create unique and flavorful cocktails, or drizzle it over desserts like ice cream or pound cake.
Storage and Usage
Both herb vinegars and shrubs can be stored in the refrigerator for an extended period if properly sealed. The flavors will continue to develop over time, so taste the vinegars or shrubs periodically to find your preferred level of intensity.
Add herb vinegars to salad dressings, marinades, or sauces to infuse them with the flavors of your favorite herbs. Herb shrubs can be mixed with sparkling water or used as a base for cocktails, adding a refreshing and tangy twist to your beverages.
Experiment with different herb and vinegar combinations to find your preferred flavors. Herb-infused vinegars and shrubs allow you to preserve herbs in unique and versatile ways while adding depth to your culinary creations.

9. Herb Salt and Sugar
Creating Herb Salt
Herb salt is a fantastic way to infuse dishes with the flavors and aromas of herbs while adding a subtle salty taste. To create herb salt, you will need fresh herbs, such as rosemary, thyme, sage, or parsley, and salt of your choice, such as sea salt or kosher salt.
Wash the herbs gently and pat them dry. Remove any damaged or wilted leaves and finely chop the herbs. In a bowl, combine the chopped herbs with an equal amount of salt, adjusting the quantities to suit your taste preferences.
Mix the herbs and salt together thoroughly until well incorporated. Spread the herb salt mixture out on a baking sheet and let it dry in a cool, dry place for about one to two days, stirring occasionally to promote even drying.
Once the herb salt has dried, transfer it to an airtight container or a salt grinder for easy dispensing. Use herb salt to enhance the flavors of your favorite dishes, whether sprinkled on grilled meats, roasted vegetables, or homemade popcorn.
Flavored Sugars with Herbs
Flavored sugars with herbs provide a delightful sweetness and aromatic touch to baked goods, hot beverages, or desserts. To make flavored sugars, select fresh, fragrant herbs like mint, lavender, or rosemary, and granulated sugar or powdered sugar.
Carefully wash the herbs to remove any dirt or debris and pat them dry. Finely chop the herbs to release their flavors. In a clean, dry bowl, combine the chopped herbs with the sugar, adjusting the quantities to suit your taste.
Mix the herbs and sugar together thoroughly, ensuring that the sugar is evenly coated with the herb flavors. Let the flavored sugar mixture sit at room temperature for a few hours to allow the flavors to meld together.
You can use flavored sugars immediately or let them sit for a longer period to develop a stronger flavor. Store the flavored sugars in airtight containers in a cool, dry place. Add flavored sugars to tea, coffee, baked goods, or sprinkle them over fresh fruits to create a touch of herb-infused sweetness.
Storing and Utilizing Herb Salt and Sugar
Herb salt and flavored sugars store well in airtight containers in a cool, dry place. Make sure to label the containers with the type of herb used and the date of creation.
Experiment with different herb and salt or sugar combinations to find your preferred flavors. Herb salt and flavored sugars can add unique and layered tastes to your cooking, allowing you to enjoy the harmonious blend of savory herbs with the sweetness of sugar.
10. Herbal Tea Blends
Choosing and Drying Herbs
Creating your own herbal tea blends allows you to customize flavors, aromas, and health benefits to suit your preferences. Start by selecting a variety of dried herbs that you enjoy or that offer specific properties. Popular choices for herbal tea blends include chamomile, peppermint, lemon balm, lavender, or hibiscus.
To create herbal tea blends, you will need to dry the selected herbs thoroughly. Harvest the herbs when they are at their peak, typically in the morning after the dew has evaporated. Rinse the herbs gently to remove any dirt or debris and pat them dry.
Blending Herbal Teas
Once the herbs are dry, you can start blending your herbal tea. Consider the flavors and aromas of each herb and how they will complement or contrast with each other. Experiment with different combinations until you find your desired blend. Start with equal parts of each herb and adjust the quantities based on your taste preferences.
Combine the dried herbs in a bowl and mix them thoroughly. You can pulverize the herbs using a mortar and pestle or use your hands to crush them gently, releasing their flavors and aromas. Ensure that the blend is evenly distributed.
Storing and Brewing Herbal Tea
Store the herbal tea blend in an airtight container away from light and moisture. Label the container with the name of the blend and the date of creation.
To brew herbal tea, boil water and pour it over a teaspoon or more of the herbal tea blend, depending on the desired strength. Let the tea steep for about five to seven minutes, allowing the flavors to infuse into the water. Strain the herbs and enjoy your homemade herbal tea.
Experiment with different herbal tea blends to create your favorites. Herbal teas offer a wide range of flavors, aromas, and health benefits, making them a delightful and soothing beverage option. With your own herbal tea blends, you can enjoy a moment of relaxation and wellness any time of the day.

