Imagine transforming a dull corner of your backyard into a vibrant oasis of greenery and beauty. With a DIY raised garden bed, you can easily achieve this and more! Whether you’re an experienced gardener or a first-time green thumb, this article will guide you through the step-by-step process of creating your very own raised garden bed. From choosing the perfect location to assembling the bed and filling it with rich soil, you’ll soon discover the joy of growing your own fruits, vegetables, and flowers right at home. So, roll up your sleeves and get ready to dig into the world of raised gardening!
Materials Needed
To create a DIY raised garden bed, you will need the following materials:
Wooden planks:
Wooden planks will form the frame of your raised garden bed. Opt for untreated lumber, as chemicals in treated wood can seep into the soil and affect plant growth.
Screws or nails:
You will need screws or nails to secure the wooden planks together and create a sturdy frame for your raised garden bed.
Measuring tape:
A measuring tape is essential to ensure accurate dimensions for your raised garden bed. It will help you determine the length, width, and height of the bed.
Saw:
A saw is necessary to cut the wooden planks to the desired length for your raised garden bed.
Drill:
A drill will come in handy when assembling the wooden planks to create the frame of the raised garden bed. It will allow you to secure the planks more efficiently.
Garden soil:
High-quality garden soil is crucial for healthy and thriving plants. Choose a nutrient-rich soil that is well-draining to provide optimal growing conditions.
Compost:
Compost adds organic matter to the soil, improving its structure and fertility. It also enhances moisture retention and provides essential nutrients for plant growth.
Mulch:
Mulch helps to regulate soil temperature, suppress weed growth, and retain moisture. Organic mulch, such as straw or wood chips, is recommended.
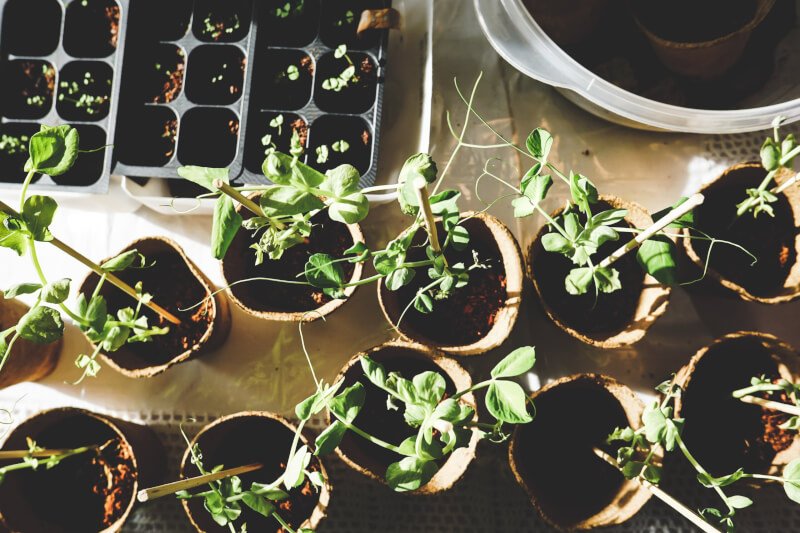
Seeds or seedlings:
Decide whether you want to start your plants from seeds or use seedlings. Seeds offer more variety and can be more cost-effective, while seedlings provide a head start and ensure quicker results.
Stakes or supports:
Depending on the plants you choose, stakes or supports may be necessary to provide stability and prevent bending or breaking of the plant stems.
Choosing a Location
Carefully selecting the right location for your raised garden bed is key to its success. Consider the following factors:
Sunlight:
Most vegetable and flower plants require at least 6-8 hours of direct sunlight daily. Choose a location with ample sunlight for your raised garden bed.
Drainage:
Ensure proper drainage by selecting a location with well-draining soil. Avoid low-lying areas that are prone to waterlogging.
Accessibility:
Consider the ease of access to your raised garden bed. It should be conveniently located for watering, harvesting, and tending to your plants.
Distance from other plants:
If you have existing plants, make sure your raised garden bed is located a sufficient distance away to prevent overcrowding and competition for resources.
Privacy:
Consider your privacy preferences when selecting a location for your raised garden bed. Choose a spot that offers the desired level of seclusion or exposure.
Visibility:
If you want to showcase your garden or enjoy the view, select a location that offers good visibility from your preferred vantage point.

Design and Size
When it comes to the design and size of your raised garden bed, consider the following factors:
Shape and Layout:
Raised garden beds can be rectangular, square, or even circular. Choose a shape that suits your needs and fits well in your chosen location.
Height:
Consider the height of your raised garden bed based on your accessibility needs. If you have back problems or prefer not to bend over, opt for a taller bed.
Width and Length:
Determine the width and length of your raised garden bed based on the available space and the number of plants you wish to grow. Remember to leave sufficient room for pathways between beds.
Accessibility:
Ensure that your raised garden bed is accessible from all sides. This layout allows you to reach all your plants without stepping into the bed, minimizing soil compaction.
Preparing the Area
Before building your raised garden bed, you need to prepare the area. Follow these steps:
Clearing the site:
Remove any existing vegetation, rocks, or debris from the site where you plan to build your raised garden bed. Clear the area entirely to provide a clean space for planting.
Leveling the ground:
Ensure the ground is level before constructing your raised garden bed. Use a rake or shovel to level out any uneven surfaces.
Removing weeds:
Thoroughly remove any weeds from the area to prevent competition for nutrients and space. Dig out the weeds or use a weed killer if necessary.
Adding organic matter:
Improve the soil quality by incorporating organic matter such as compost or well-rotted manure. This will enhance the fertility and structure of the soil, promoting root development.
Creating a border:
To define the edges of your raised garden bed and prevent soil erosion, create a border using rocks, bricks, or additional wooden planks. This will give your garden a neat and organized look.

Building the Raised Garden Bed
Now it’s time to get your hands dirty and build your raised garden bed. Follow these steps:
Cutting the wood:
Using a saw, cut the wooden planks to the desired length based on your chosen dimensions for the raised garden bed.
Assembling the frame:
Lay out the wooden planks in the desired shape and use screws or nails to attach them together, forming the frame of the raised garden bed.
Securing the corners:
Ensure the corners of the frame are secure by adding additional screws or nails. This step will provide stability and prevent the planks from shifting.
Attaching supports:
If your plants require support, attach stakes or supports to the sides of the raised garden bed. This will help prevent plants from bending or breaking under their weight.
Adding a base (optional):
Consider adding a base to your raised garden bed to further prevent weed growth and protect the soil from pests. Use a weed barrier fabric or a layer of cardboard.
Filling the Raised Garden Bed
Once the raised garden bed is built, it’s time to fill it with soil and other materials. Follow these steps:
Layering materials:
Begin by layering organic materials such as leaves, grass clippings, or straw at the bottom of the raised garden bed. This will promote soil aeration and nutrient absorption.
Mixing the soil:
Mix the garden soil with compost to improve its fertility. Use a garden fork or a shovel to thoroughly combine the two materials.
Adding compost:
Add a generous layer of compost on top of the soil mixture. This will provide additional nutrients to your plants as they grow.
Adding mulch:
Finish off by adding a layer of mulch on top of the soil. Mulch helps suppress weed growth, retain moisture in the soil, and regulate soil temperature.

Planting
Now that your raised garden bed is ready, it’s time to plant your desired plants. Consider the following steps:
Choosing the right plants:
Select plants that are suitable for your climate, available sunlight, and personal preferences. Consider both vegetables and flowers to create a diverse and beautiful garden.
Planting seeds:
If you are starting from seeds, follow the packet instructions regarding planting depth, spacing, and watering requirements. Sow the seeds evenly and cover with a thin layer of soil.
Planting seedlings:
If you are using seedlings, dig holes in the soil based on the recommended spacing for each plant. Place the seedlings in the holes and gently firm the soil around them.
Spacing:
Ensure proper spacing between plants to allow for optimal growth and airflow. The spacing requirements vary for different plants, so refer to the seed packet or nursery recommendations.
Planting techniques:
Plant your seeds or seedlings at the appropriate depth and water them gently after planting. Be mindful of any specific care instructions for each plant variety.
Watering and Maintenance
To ensure the health and vitality of your raised garden bed, adopt the following watering and maintenance practices:
Watering frequency:
Water your raised garden bed regularly to keep the soil moist but not waterlogged. Different plants have varying water needs, so monitor the moisture levels and adjust accordingly.
Monitoring moisture levels:
Check the moisture levels of the soil by inserting your finger into the soil. Water if the top inch feels dry. Be cautious not to overwater, as it can lead to root rot and other issues.
Weeding:
Regularly inspect your raised garden bed for any weeds and promptly remove them. Weeds compete with your plants for nutrients and can inhibit their growth.
Mulching:
Maintain a layer of mulch on top of the soil to help suppress weed growth and retain moisture. Renew the mulch as needed to maintain the recommended thickness.
Fertilizing:
Consider fertilizing your raised garden bed to provide additional nutrients to the plants. Use organic fertilizers and follow the instructions for application rates and timing.

Pest and Weed Control
To keep pests and weeds at bay in your raised garden bed, implement the following strategies:
Identifying pests and weeds:
Regularly inspect your garden for signs of pests, such as chewed leaves or holes. Familiarize yourself with common garden pests and promptly address any pest issues.
Preventative measures:
Practice good garden hygiene and maintenance to prevent pest and weed infestations. Regularly remove any dead or diseased plant material and dispose of it properly.
Organic pest control:
Explore organic pest control methods, such as natural predators, companion planting, and homemade sprays. Minimize the use of chemical pesticides to protect the environment and beneficial insects.
Weed removal techniques:
Remove weeds as soon as you notice them. Gently pull them out by hand, ensuring you remove both the roots and above-ground parts. Consider using mulch to prevent weed growth.
Harvesting and Enjoying
The ultimate reward of your hard work is harvesting and enjoying the fruits (and vegetables) of your labor. Follow these steps:
When to harvest:
Refer to the specific plant’s instructions or guidelines for determining the optimal time for harvesting. Harvest when the fruit, flower, or vegetable is ripe and at its peak flavor.
Harvesting techniques:
Use appropriate tools, such as scissors or pruners, to harvest your plants without damaging them. Be gentle when handling delicate fruits or flowers to avoid bruising.
Preservation methods:
If you have a bountiful harvest, consider preserving some of it for later use. Explore different preservation methods, such as canning, freezing, or drying, depending on the produce.
Enjoying the garden:
Take the time to relax and enjoy the beauty and serenity of your raised garden bed. Sit nearby and appreciate the colors, scents, and sounds of nature that your garden provides.
Creating a DIY raised garden bed allows you to take control of your own food production and enjoy the benefits of gardening. With the right materials, careful planning, and proper maintenance, you can create a thriving garden that brings joy and satisfaction. So grab your tools, get started, and let your green thumb flourish!


