If you’ve always wanted to try your hand at gardening, building your own greenhouse is a great place to start. A DIY greenhouse allows you to create the perfect environment for your plants, regardless of the season or climate. In this beginner’s guide, we’ll walk you through the step-by-step process of building your very own greenhouse, from choosing the right location to selecting the materials and tools you’ll need. Get ready to dig in and watch your garden flourish all year round!
Choosing the Right Location
When it comes to building your own greenhouse, one of the first and most important steps is choosing the right location. The success of your greenhouse depends heavily on its placement, so take the time to consider a few key factors.
Consider the sun exposure
Sun exposure is crucial for the health and growth of your plants, so it’s important to choose a location that receives ample sunlight throughout the day. Ideally, your greenhouse should be placed in an area that gets at least six hours of direct sunlight. Take note of any trees, buildings, or other objects that might cast shade on your greenhouse and make sure to avoid these areas.
Check for shade sources
While sunlight is important, too much direct sunlight or heat can also be damaging to your plants. It’s prudent to check for nearby shade sources that can help protect your plants during the hottest part of the day. This can include trees, walls, or even the shadow of your house. Some plants thrive with partial shade, so finding a balance between sunlight and shade will ensure optimal growing conditions.
Evaluate the wind patterns
Strong winds can wreak havoc on your greenhouse and damage your plants. Before finalizing the location, evaluate the wind patterns in your area. Consider the direction and strength of prevailing winds, and choose a spot that is shielded or protected from strong gusts. This can be achieved by placing your greenhouse near a fence, wall, or existing buildings. While you want to ensure proper air circulation, it’s important to strike a balance and avoid excessive wind exposure.
Deciding on the Type of Greenhouse
Once you have chosen the perfect location for your greenhouse, it’s time to start thinking about what type of structure you want to build. Here are some key factors to consider when deciding on the type of greenhouse.
Consider the available space
The size of your greenhouse will largely depend on the available space you have. Take some time to assess how much room you have and visualize what size and shape of greenhouse would fit best. Remember to leave enough space around the greenhouse for easy access and maintenance.
Choose between a freestanding or attached greenhouse
Another important decision is whether you want a freestanding or attached greenhouse. A freestanding greenhouse is entirely independent, standing alone separate from any existing structures. On the other hand, an attached greenhouse is connected to your home or another building, making it more convenient for accessing utilities and providing additional insulation. Consider your preferences, available space, and how you plan to use your greenhouse when making this decision.
Decide on the shape and size
The shape and size of your greenhouse will depend on the specifics of your gardening needs and available space. Greenhouses come in various forms, such as gable, dome, or even lean-to style. Consider the types of plants you want to grow and their space requirements. Additionally, think about the height and width needed for your plants to grow comfortably. Plan accordingly and choose a shape and size that will allow you to maximize your gardening efforts.
Materials and Tools Needed
Once you have finalized the location and type of greenhouse, it’s time to gather the materials and tools needed for the construction process. Here are some key considerations when selecting materials and tools.
Selecting the frame materials
The frame of your greenhouse is the skeleton that provides structure and support. Common materials used for framing include wood, aluminum, or galvanized steel. Each material has its own advantages and disadvantages, so weigh the pros and cons based on your budget, climate, and personal preferences. Consider factors such as durability, cost, and ease of construction.
Choosing the appropriate glazing material
Glazing refers to the material that covers the frame of your greenhouse, allowing sunlight to pass through while providing insulation and protection. There are several options to choose from, including glass, polycarbonate, or polyethylene film. Glass provides excellent visibility and durability but is more expensive and heavier. Polycarbonate is lightweight, shatterproof, and provides good insulation, but can be more expensive. Polyethylene film is the most affordable option, provides good light transmission, but may need to be replaced more frequently. Assess your budget, climate, and needs when selecting the glazing material.
Gathering necessary tools
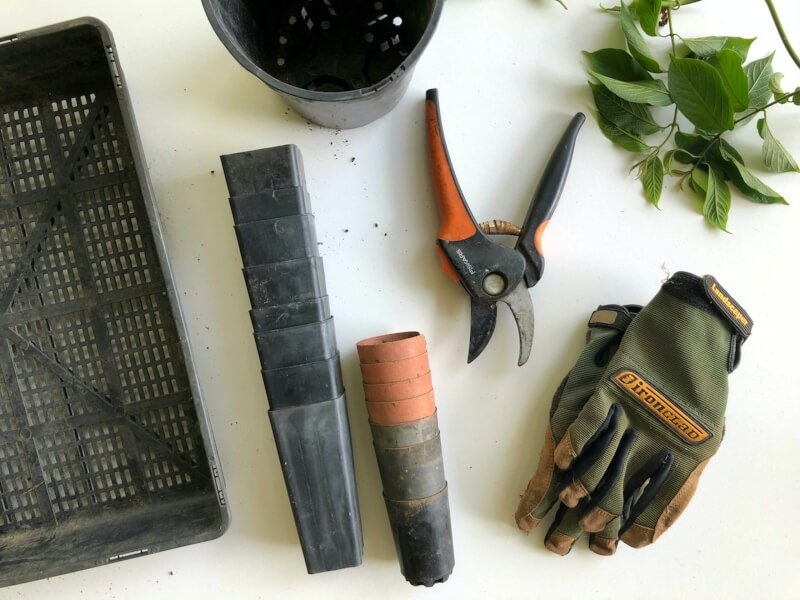
Building a greenhouse will require various tools to complete the construction process. Some essential tools may include a tape measure, level, drill, screws, saw, hammer, and a ladder. Make a list of the tools you don’t already have and ensure you have everything on hand before you begin. Having the necessary tools readily available will help streamline the construction process and ensure it goes smoothly.
Building the Foundation
Now that you have all the materials and tools assembled, it’s time to start building the foundation of your greenhouse. The foundation serves as a sturdy base for the entire structure, providing stability and preventing shifting or settling. Follow these steps to create a solid foundation for your greenhouse.
Preparing the site
Before you can start building the foundation, it’s important to properly prepare the site. Clear away any debris, rocks, or vegetation that may interfere with the construction process. Level the ground using a shovel or a rake to ensure a flat surface for the foundation.
Choosing the type of foundation
There are several types of foundations you can choose from, depending on your needs and preferences. The most common options include concrete slabs, gravel or paver bases, or even raised beds. Concrete slabs provide a durable and level surface, but require more extensive preparation and construction. Gravel or paver bases offer a more cost-effective and simpler alternative. Raised beds are ideal for those looking for more flexibility and portability. Research each option and choose the foundation type that best suits your needs.
Constructing the base
Once you have chosen the type of foundation, it’s time to start constructing the base of your greenhouse. Following the instructions specific to your chosen foundation type, carefully build the base ensuring it is level, square, and secure. Take your time during this step, as a strong and level base is crucial for the stability and longevity of your greenhouse.
Constructing the Frame
With the foundation in place, it’s time to move on to constructing the frame of your greenhouse. The frame provides the structure and support for the entire greenhouse, so it’s important to follow the construction steps carefully.
Creating the base structure
Start by assembling the base structure of your greenhouse. This typically involves connecting the vertical and horizontal frame components, creating the main structure of the greenhouse. Follow the manufacturer’s instructions or your specific design plans to ensure proper assembly. Double-check that all connections are secure and tight.
Installing the frame components
Once the base structure is complete, it’s time to install the remaining frame components. This may include ridge beams, rafters, and side posts, among others. Check your design plans or instructions to determine the proper placement and installation of each component. Pay attention to detail and ensure everything is securely fastened.
Securing the frame
After all the frame components are installed, take the time to double-check the stability and integrity of the frame. Ensure that all connections are tight, and reinforce any weak areas if necessary. A solid and secure frame is essential for the longevity and durability of your greenhouse.
Installing Doors and Windows
Now that the frame of your greenhouse is complete, it’s time to focus on installing doors and windows. Proper ventilation is crucial for maintaining a healthy growing environment, so ensure you make the right choices when it comes to these openings.
Choosing the type of doors
When it comes to choosing doors for your greenhouse, consider both functionality and aesthetics. There are various options available, including sliding doors, double doors, or even Dutch doors. Sliding doors are a popular choice as they save space and provide easy access. Double doors offer a wider opening for larger equipment or plants. Dutch doors provide flexibility, allowing you to open the top half while keeping the bottom closed. Assess your needs and select the door type that best suits your preferences and usage.
Installing vents and windows
In addition to doors, installing vents and windows is essential for proper ventilation in your greenhouse. Ventilation allows for temperature regulation, air circulation, and humidity control. Consider adding roof vents, side windows, or even automated systems to help with airflow management. Install these openings strategically, ensuring they are easily accessible and provide optimal air exchange for your plants’ needs.
Ensuring proper sealing
To prevent heat loss, drafts, or excess humidity, it’s important to ensure proper sealing around doors, vents, and windows. Use weather stripping, caulking, or gaskets to create a tight seal and prevent any unwanted air leakage. Proper sealing will help maintain a stable environment inside the greenhouse and enhance energy efficiency.
Installing the Covering
With the doors, windows, and vents installed, it’s time to move on to installing the covering of your greenhouse. The covering is the material that provides insulation, protection, and light transmission to your plants.
Measuring and cutting the glazing material
Start by measuring and cutting the glazing material to fit the dimensions of your greenhouse frame. Whether you’re using glass, polycarbonate, or polyethylene film, accuracy is key. Take precise measurements and use appropriate tools to cut the material to the correct size. This step may require extra care and patience to ensure a proper fit.
Securing the covering
Once the glazing material is cut, carefully secure it to the frame of your greenhouse. Depending on the material, this may involve using clips, screws, or other fasteners. Follow the manufacturer’s instructions or guidelines when securing the covering, ensuring that it is tight and securely attached. Pay attention to any overlapping or gaps that may compromise insulation or protection.
Adding additional insulation
To enhance the insulation of your greenhouse, consider adding additional layers or insulation materials. Bubble wrap, straw, or even special greenhouse insulation blankets can help reduce heat loss during colder months. Install these additional layers strategically, ensuring they don’t obstruct ventilation or light transmission.
Setting Up Ventilation
Proper ventilation is crucial for a successful greenhouse, as it helps regulate temperature, humidity, and air circulation. Here are some steps to follow when setting up ventilation in your DIY greenhouse.
Installing fans or ventilation systems
Consider installing fans or ventilation systems to help with air circulation and temperature control. Fans can be strategically placed to move air, preventing stagnant pockets and promoting even distribution. Ventilation systems, such as exhaust fans or louvers, can also be incorporated to remove hot air and bring in fresh, cooler air. These additions will help create a more stable and optimal growing environment for your plants.
Placing vents strategically
In addition to fans and ventilation systems, strategically placing vents throughout your greenhouse is essential. Vents can be located at the roof, sidewalls, or even the bottom of the greenhouse. Assess your specific needs and the design of your greenhouse to determine the ideal placement of vents. This will ensure optimal air exchange and prevent any pockets of stagnant or humid air.
Considering heating and cooling options
Depending on your climate and the type of plants you intend to grow, you may need to consider heating and cooling options for your greenhouse. This can include installing heaters, evaporative cooling systems, or even shade cloths. Assess your specific needs and research the appropriate heating or cooling methods. Proper temperature regulation will contribute to the overall health and success of your plants.
Providing Proper Lighting
In addition to sunlight, providing proper lighting is vital for your greenhouse. Whether you choose to rely on natural light or supplement with artificial grow lights, here are some key considerations.
Choosing grow lights or natural lighting
Evaluate the amount of natural light your greenhouse receives and the specific needs of your plants. While sunlight is the most cost-effective and natural light source, certain plants may require additional lighting. In such cases, you can opt for artificial grow lights to supplement natural light. LED or fluorescent lights are popular options, as they are energy-efficient and emit the appropriate light spectrum for optimal plant growth.
Positioning the lights
Ensure that your lighting system, whether natural or artificial, is properly positioned to provide adequate coverage to all your plants. Consider the height, intensity, and distance of the lights from your plants. Achieving a uniform and balanced lighting setup will help promote healthy and even growth.
Monitoring light intensity
Regularly monitor the light intensity in your greenhouse to ensure it meets the needs of your plants. Different plants require different levels of light, so it’s essential to measure the intensity using a light meter or by observing plant responses. Adjust your lighting system as needed to maintain the ideal light levels for optimal plant growth.
Maintaining the Greenhouse
Congratulations on successfully building your DIY greenhouse! However, the work doesn’t stop there. Proper maintenance is essential to ensure the longevity and health of your greenhouse and plants.
Regular cleaning and sanitizing
Regular cleaning and sanitizing is crucial for preventing the build-up of pests, diseases, and plant debris. Clear away any fallen leaves, dead plants, or other debris that may accumulate in your greenhouse. Regularly disinfect surfaces, tools, and equipment to reduce the risk of pests and diseases. Maintaining a clean and sanitary environment will help promote healthy plant growth.
Pest and disease control
Pests and diseases can quickly spread and damage your plants if left unchecked. Implement a pest control and monitoring system that includes regular inspections, proper plant hygiene, and the correct use of organic or chemical treatments. Identify common pests and diseases in your area and take the necessary preventive measures to protect your greenhouse and plants.
Inspecting for maintenance needs
Regularly inspect your greenhouse for any maintenance needs. Check for loose or damaged components, leaks, or any signs of wear and tear. Address these issues promptly to prevent further damage and ensure the structural integrity of your greenhouse. Regular maintenance and repairs will help prolong the lifespan of your greenhouse and create a safe and functional growing environment.
Building a DIY greenhouse is an exciting venture that offers countless benefits. By choosing the right location, deciding on the type of greenhouse, gathering the necessary materials and tools, and carefully constructing each component, you’ll be well on your way to enjoying a thriving greenhouse filled with healthy and bountiful plants. Remember to provide proper ventilation, lighting, and maintenance to create an optimal growing environment for your plants. Happy gardening!
