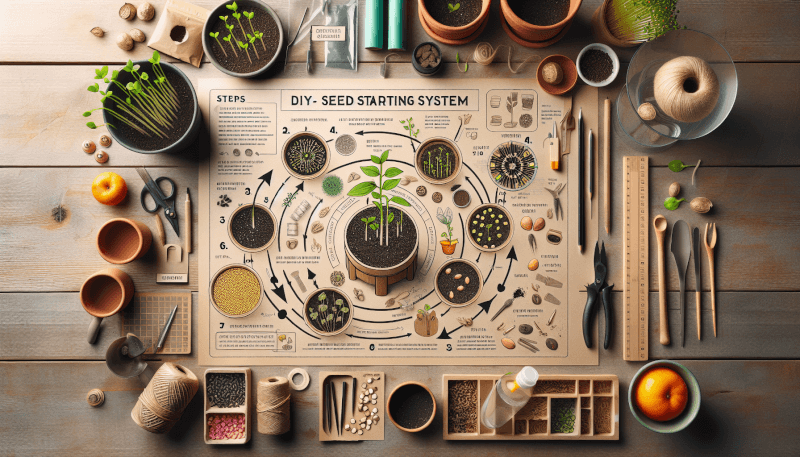
In this article, you will discover the secrets of creating your very own DIY seed starting system. Whether you have a green thumb or you’re a novice gardener, this step-by-step guide will provide you with all the necessary information to kickstart your journey to growing your own plants from seeds. From choosing the right containers to providing the optimal conditions for germination, we will equip you with the knowledge and confidence to cultivate a thriving garden right in your own backyard. So grab your gardening gloves and get ready to embark on this exciting and rewarding venture.
Choosing the Right Containers
When starting your own DIY seed starting system, one important consideration is choosing the right containers for your plants. Take into account the size and depth of the containers, as different plants have different root systems and space requirements. A general rule of thumb is to select containers that are at least 2-3 inches deep, allowing ample room for the roots to grow.
Another aspect to consider is opting for biodegradable containers. These containers are typically made from materials such as peat, coconut coir, or bio-plastics, and they can be planted directly into the soil once the seedlings are ready for transplanting. Using biodegradable containers eliminates the need for transplanting, reducing the risk of damaging the delicate roots of your seedlings.
Lastly, ensure that the containers you choose have drainage holes. Adequate drainage is essential for preventing waterlogged soil and root rot. If your containers don’t have pre-drilled holes, you can easily create them using a drill or a hot nail. Proper drainage allows excess water to escape, providing your seedlings with a healthy growing environment.
Preparing the Growing Medium
The growing medium in which your seeds will germinate and grow is a crucial factor in the success of your DIY seed starting system. Selecting the right type of growing medium is essential. Seed starting mixes, which are usually composed of sphagnum peat moss, vermiculite, and perlite, are commonly used for seed germination. These mixes provide good moisture retention and aeration for developing seedlings.
Before filling your containers with the growing medium, it’s important to sterilize it to eliminate any potential pathogens or weed seeds. This can be done by heating the medium in an oven at 180°F for about 30 minutes or by using a microwave. Sterilization ensures a clean and healthy environment for your seeds to germinate.
To enhance the growth of your seedlings, consider mixing in nutrients and amendments into the growing medium. Adding slow-release fertilizers or organic compost can provide essential nutrients that will support strong and vigorous growth. Pay attention to the specific needs of the plants you are growing and adjust the nutrient mix accordingly.
Providing the Right Temperature and Lighting
Temperature and lighting play crucial roles in the success of your DIY seed starting system. Determine the optimal temperature range for the seeds you are sowing by referring to the seed packets or conducting research. Most seeds require a temperature between 65°F and 75°F for optimal germination. To maintain this temperature range, you can use a seedling heat mat or place your containers near a heat source such as a radiator or heating pad.
While temperature is important, light is equally vital for photosynthesis and healthy seedling growth. If you don’t have access to sufficient natural sunlight, consider using supplemental lighting. LED grow lights are a popular and energy-efficient option for providing the necessary light spectrum for plant growth. Position the lights a few inches above the seedlings and adjust the height as the plants grow taller.
It’s important to note that while seedlings require bright light, direct sunlight can be too intense and damaging. Avoid placing your seedlings in direct sunlight, as it can cause the soil to dry out quickly and scorch delicate leaves. Instead, opt for a well-lit area indoors or provide filtered sunlight through a sheer curtain.
Watering and Moisture Control
Proper watering and moisture control are essential for the health and development of your seedlings. Understanding the watering needs of your plants is key. Some plants prefer evenly moist soil, while others thrive in slightly drier conditions. It’s important to strike a balance and avoid overwatering or underwatering.
Using a moisture meter can be a helpful tool in assessing the moisture levels of your growing medium. These inexpensive devices allow you to accurately measure the moisture content, ensuring you don’t drown your seedlings or let them dry out completely. Insert the probe into the soil, and the meter will display the moisture level.
To prevent overwatering, always check the moisture level before watering and adjust accordingly. If the soil feels damp, hold off on watering until it starts to dry out. On the other hand, if the soil feels dry, it’s time to water your seedlings. Water gently and evenly, avoiding strong streams that can disturb the delicate roots.
Seeding Techniques
When it comes to seeding in your DIY seed starting system, selecting the right seeds is essential. Consider the specific requirements of the plants you want to grow, including their preferred growing conditions, such as temperature and light requirements. Choose high-quality seeds from reputable suppliers to ensure germination and healthy growth.
Before sowing the seeds, it’s important to properly prepare them. Some seeds, especially those with hard shells or thick coatings, benefit from gentle scarification or soaking in warm water to help break dormancy and promote germination. Read the instructions on the seed packets or conduct research to learn about any specific requirements for the seeds you are planting.
When sowing the seeds, follow the recommended depth and spacing guidelines. Generally, seeds should be planted at a depth two to three times their diameter. Gently press the soil down over the seeds to ensure good seed-to-soil contact. Label your containers with the name and date of sowing to avoid confusion later on.
Labeling and Organization
Maintaining clear labels and proper organization is vital for managing your DIY seed starting system. Create clear and legible labels for your containers to keep track of the types of seeds and the dates of sowing. Use waterproof markers or labels to ensure they don’t smudge or fade over time.
Organizing your seed trays or containers is also important for easy access and efficient growth monitoring. Group similar plants together, making it easier to provide specific care and support as needed. Consider organizing your containers in a shelving system or on a designated growing table to maximize space and ensure proper air circulation.
Keeping a seed inventory can also be helpful for tracking your supplies and planning for future sowings. Create a list of the seeds you have on hand, including their expiration dates if available. Regularly update the inventory as you use up seeds or acquire new ones to maintain accurate records.
Germination and Seedling Care
Germination is an exciting stage in your DIY seed starting journey. To provide the right conditions for germination, ensure that the environment is consistently warm and moist. Regularly check the moisture levels of the growing medium and adjust watering accordingly to prevent drying out or oversaturation.
As your seedlings grow, it becomes necessary to transplant them into larger containers to allow for further root development. This process, known as transplanting, should be done carefully to avoid damaging the delicate roots. Gently loosen the seedlings from the container, holding them by the leaves to avoid crushing or harming the stem, and transplant them into larger pots filled with fresh growing medium.
During this stage, it’s important to protect your seedlings from pests. Common pests such as aphids, gnats, and fungus gnats can hinder healthy growth. Regularly inspect your seedlings for any signs of damage or infestation, and take appropriate action to prevent further damage. Use organic pest control methods such as neem oil or insecticidal soaps to address pest problems.
Pruning and Thinning
At some point in your DIY seed starting system, you may need to prune and thin your seedlings to ensure healthy growth and prevent overcrowding. Pruning involves removing any damaged or diseased leaves or stems to maintain the overall health of the plants. Thinning, on the other hand, involves removing excess seedlings to create more space and resources for the remaining plants to thrive.
Knowing when to prune and thin depends on the growth stage and the specific requirements of the plants you are growing. Generally, it’s best to wait until the seedlings have developed their first true leaves before pruning or thinning. This ensures that the plants have sufficient energy reserves to recover from the process.
When pruning, use clean and sharp tools to make clean cuts, minimizing the risk of introducing pathogens. Remove any dead or yellowing leaves, as well as any stems that appear weak or damaged. Make the cuts just above a leaf node or bud to encourage new growth.
When thinning, carefully remove the weakest or excess seedlings, leaving the healthiest and most vigorous ones in each container. Thinning prevents overcrowding, allowing the remaining seedlings to receive adequate light, nutrients, and water for optimal growth.
Fertilizing and Nutrient Management
Proper fertilizing and nutrient management are crucial for nourishing your seedlings and promoting healthy growth. Choosing the right fertilizer for your plants is important. Consider using a balanced, water-soluble fertilizer with a ratio such as 10-10-10 or 20-20-20. These fertilizers provide a good mix of nitrogen, phosphorus, and potassium, essential for overall plant health.
Create a fertilization schedule to ensure regular and consistent feeding. Dilute the fertilizer according to the manufacturer’s instructions and apply it to the seedlings every two to three weeks. Avoid overfertilizing, as this can lead to nutrient imbalances and damage the delicate roots.
Monitoring nutrient levels in your seed starting system can provide valuable insights into your plants’ health and growth. Use a soil testing kit or send samples to a laboratory for analysis to assess the nutrient content of the growing medium. Adjust your fertilization routine based on the results, ensuring your seedlings receive the nutrients they need for optimal development.
Hardening Off and Transplanting
Before transplanting your seedlings into the outdoor garden, it’s important to gradually acclimate them to the outdoor conditions. This process, known as hardening off, helps the seedlings adjust to factors such as temperature, sunlight intensity, and wind. Start by placing your seedlings outside in a sheltered area for a few hours each day, gradually increasing their exposure over the course of a week or two.
Preparing the soil for transplanting is also essential. Clear the area of any weeds or debris, and incorporate organic matter such as compost or well-rotted manure to improve soil fertility and structure. Ensure the soil is well-draining and adequately pre-moistened before transplanting your seedlings.
When transplanting, dig a hole slightly larger than the root ball of your seedling. Gently remove the seedling from its container, being careful not to disturb or damage the roots, and place it in the hole. Fill the hole with soil, firming it gently around the base of the seedling. Water thoroughly to settle the soil and provide moisture to the newly transplanted seedling.
By following these comprehensive steps, you can create and maintain your own DIY seed starting system with confidence. Whether you’re a novice gardener or an experienced green thumb, this guide will help you produce healthy and thriving seedlings ready for transplanting into your beautiful garden. Enjoy the satisfaction of growing your own plants from seeds and witness the transformation from tiny seeds to flourishing plants. Happy seed starting!
