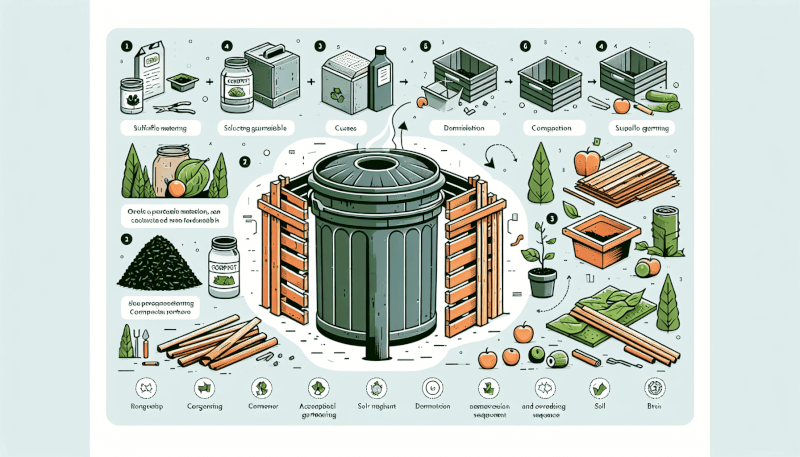
If you’re looking to give your garden a natural boost, creating a DIY compost bin is the way to go. By recycling organic waste like kitchen scraps and yard trimmings, you can produce nutrient-rich compost that will nourish your plants and reduce your carbon footprint. In this article, we’ll guide you through the simple steps of making a DIY compost bin that will not only benefit your garden, but also help you contribute to a healthier environment. So, roll up your sleeves and get ready to turn your waste into garden gold!
Materials needed
To make a DIY compost bin for your garden, you will need the following materials:
Wooden pallets
Wooden pallets are perfect for building the walls of your compost bin. They are sturdy, readily available, and allow for good airflow.
Hardware cloth or wire mesh
You will need hardware cloth or wire mesh to create a barrier that will keep pests out of your compost bin while still allowing air to circulate.
Screws or nails
Screws or nails will be used to attach the wooden pallets together and create stable walls for your compost bin.
Hinges
Hinges will be used to attach a door to your compost bin, allowing for easy access to the compost pile.
Drill or screwdriver
A drill or screwdriver will be needed to secure the wooden pallets and hinges in place.
Saw
A saw will be used to trim the wooden pallets to the desired size and shape for your compost bin.
Hammer
A hammer will come in handy for any additional fixing or adjustments needed during the construction process.
Measuring tape
A measuring tape will be useful to ensure that the dimensions of your compost bin are accurate and consistent.
Pencil
A pencil will be used for marking measurements and guide lines on the wooden pallets during construction.
Gloves
Wearing gloves is essential for protecting your hands from splinters, sharp edges, and any potentially harmful substances that may be present in the compost pile.
Choosing the right location
Selecting the right location for your compost bin is crucial for its success. Here are some factors to consider:
Sunlight exposure
Choose a location that receives ample sunlight. Sunlight helps to speed up the decomposition process and ensures the compost remains adequately heated.
Proximity to water source
Place your compost bin near a water source for easy access when it’s time to moisten the compost pile. Avoid placing it too close to your home, as the composting process can sometimes emit an odor.
Accessibility
Consider the ease of accessibility to your compost bin. It should be located within a convenient distance from your kitchen and garden, making it easy for you to add compostable materials and retrieve finished compost.
Consideration of airflow
Good airflow is essential for composting. Choose a location where there is adequate air circulation to help the natural decomposition process.
Avoiding low-lying areas
Avoid placing your compost bin in low-lying areas prone to excess water accumulation. Excess moisture can hinder the decomposition process and make it difficult for the compost to reach an optimal consistency.

Preparing the site
Once you have chosen the location for your compost bin, follow these steps to prepare the site:
Clearing the area
Clear any plants, rocks, or debris from the chosen location. This will ensure a clean and level space for your compost bin.
Leveling the ground
Use a shovel or garden rake to level the ground where the compost bin will be placed. A level surface will provide stability and prevent any unwanted shifting.
Removing any weeds or grass
Remove any weeds or grass from the area where your compost bin will be located. Weeds and grass can compete with the composting process for nutrients and can introduce unwanted seeds into your compost.
Creating a base
Consider creating a base for your compost bin to prevent direct contact with the ground. This can be done using bricks, cinder blocks, or a layer of gravel. This will help with drainage and prevent the bottom of the compost pile from becoming waterlogged.
Building the compost bin
With the site prepared, it’s time to start building your compost bin. Follow these steps:
Determining the size and shape
Decide on the size and shape of your compost bin based on the amount of compostable waste you generate and the available space in your garden.
Using the wooden pallets as walls
Position the wooden pallets vertically, with the slat gaps parallel to the ground. The pallets will act as the walls of your compost bin.
Attaching the pallets together
Using screws or nails, secure the wooden pallets together at the corners or wherever they intersect. This will ensure stability and durability for your compost bin.
Adding a hinged door
Choose one of the pallets to serve as the door for your compost bin. Attach hinges to this pallet and secure it to the compost bin frame. This will allow for easy access when adding or removing compost.
Installing the hardware cloth or wire mesh
Attach the hardware cloth or wire mesh to the inside of the compost bin walls. This will create a barrier, preventing pests from entering while still allowing air to circulate.

Improving ventilation
Proper ventilation is essential for a healthy compost pile. Here are some methods to improve airflow:
Creating gaps between pallets
Leave small gaps between the wooden pallets when constructing the compost bin. These gaps will allow air to enter and circulate throughout the compost pile.
Drilling holes on the sides
Using a drill, create several small holes on the sides of your compost bin. These holes will promote airflow and prevent the compost pile from becoming overly compacted.
Adding a chimney or ventilation pipes
For larger compost bins, consider adding a chimney or ventilation pipes to improve airflow. These can be constructed using PVC pipes or other similar materials. The chimney or pipes should extend above the compost pile to allow air to flow freely.
Adding a composting base
Now that your compost bin is built and ventilated, it’s time to start composting. Follow these steps to create a composting base:
Layering materials
Start by layering your composting materials to create the foundation for decomposition. Begin with a layer of twigs or straw at the bottom of the compost bin. This will create air gaps, aiding in drainage and preventing the compost pile from becoming waterlogged.
Adding nitrogen-rich green waste
Add a layer of nitrogen-rich green waste, such as kitchen scraps, fresh grass clippings, or green leaves. These materials provide essential nutrients for the composting process.
Including carbon-rich brown waste
Next, add a layer of carbon-rich brown waste, such as dry leaves, twigs, or shredded newspaper. These materials help balance the carbon to nitrogen ratio and prevent the compost pile from becoming too acidic.
Moistening the layers
After each layer, lightly moisten the materials with water. The moisture level should be similar to that of a wrung-out sponge. This will create the optimal environment for decomposition.
Turning the pile regularly
To ensure even decomposition, regularly turn the compost pile using a pitchfork or shovel. This helps to mix the materials and provides oxygen to the microorganisms responsible for breaking down the organic matter.

Maintaining the compost bin
To ensure a successful composting process, it’s important to properly maintain your compost bin. Here are some tips:
Monitoring moisture levels
Regularly check the moisture level of your compost pile. Moisture should be maintained at a consistent level, similar to a wrung-out sponge. If the pile is too dry, add water. If it’s too wet, add dry brown waste to absorb excess moisture.
Turning the compost
Regularly turn the compost pile to aerate the materials and facilitate decomposition. Aim to turn the pile every few weeks or whenever the center temperature drops below 100°F (38°C).
Balancing the carbon to nitrogen ratio
Maintain a balance between carbon-rich brown waste and nitrogen-rich green waste. The ideal carbon to nitrogen ratio is roughly 30:1. If your compost pile becomes too acidic or develops an unpleasant odor, adjust the ratio accordingly.
Preventing pests and insects
Monitor your compost bin for any signs of pests or insects. To deter unwanted critters, avoid adding meat, dairy products, or fats to your compost pile. Covering the pile with a breathable material, such as burlap, can also help prevent pests from entering.
Covering the bin
Covering your compost bin with a breathable material, such as a tarp or old carpet, can help retain moisture and regulate temperature. It can also keep unwanted pests and rodents out while still allowing airflow.
Troubleshooting common issues
Even with proper maintenance, you may encounter some common issues with your compost. Here’s how to troubleshoot them:
Bad odor
If your compost pile emits a foul odor, it may be too wet or lack sufficient airflow. Adjust the moisture level by adding dry brown waste or turning the pile more frequently to increase airflow.
Slow decomposition
If the composting process is taking longer than expected, check the carbon to nitrogen ratio of your compost pile. Adding more nitrogen-rich green waste can help speed up decomposition. Also, ensure that the pile is consistently moist and well-aerated.
Pests and rodents
If you notice pests or rodents in your compost bin, make sure you are not adding meat, dairy products, or oily substances that may attract them. Secure the compost bin door with a latch or lock and avoid leaving it open for extended periods.
Unpleasant appearance
If your compost pile appears slimy or clumpy, it may be too wet. Adjust the moisture level by adding dry brown waste and turning the pile to increase airflow. If the pile appears dry and lacks decomposition, add more moisture and turn the pile more frequently.

Harvesting the compost
After a few months of composting, your compost pile will transform into nutrient-rich humus. Here’s how to harvest and use it in your garden:
Determining when the compost is ready
Compost is ready to use when it has a dark brown, crumbly texture and an earthy smell. The original materials should be unrecognizable, and the pile should have cooled down significantly from its initial temperature.
Sifting the compost
To collect larger pieces of unfinished compost, you can sift the finished compost using a garden sieve or screen. This will provide a finer texture for use in potting mixes or as a top dressing for plants.
Using the compost in the garden
Once harvested, apply the compost to your garden beds as a soil amendment or mulch. Mix it into the soil to improve fertility, moisture retention, and overall soil health. You can also use compost as a top dressing around plants or as a potting mix component for container gardening.
Tips for successful composting
To ensure a successful composting process, here are some additional tips:
Maintaining the right balance of materials
Ensure a proper balance between carbon-rich brown waste and nitrogen-rich green waste. This balance will promote decomposition and prevent potential issues such as odor, pests, or slow decomposition.
Shredding large items
Large items, such as branches or newspaper, decompose more slowly. To speed up the process, shred or chop them into smaller pieces before adding them to the compost pile.
Avoiding adding meat or dairy products
Meat, dairy products, and oily substances can attract pests, rodents, and emit unpleasant odors. It’s best to avoid adding these materials to your compost pile.
Regularly turning the pile
Regularly turning the compost pile ensures that all materials are exposed to oxygen and promotes even decomposition. Aim to turn the pile every few weeks or whenever the center temperature drops below 100°F (38°C).
Adding composting accelerators
Composting accelerators, such as compost starter or activator, can be added to your compost pile to speed up decomposition. These products are typically rich in beneficial microorganisms that help break down organic matter faster.
With these comprehensive instructions, you can now confidently create a DIY compost bin for your garden. Enjoy the benefits of turning kitchen scraps and garden waste into nutrient-rich compost that will enhance the health and productivity of your plants. Happy composting!

