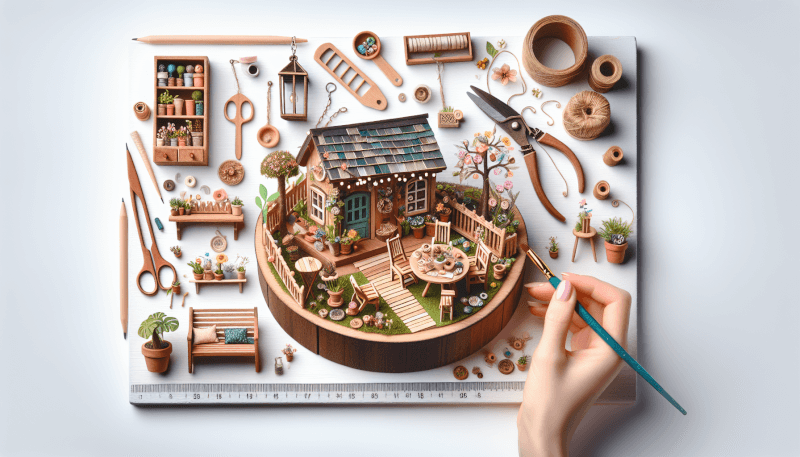
Imagine stepping into a whimsical world filled with enchantment and magic. A world where tiny fairies reside amongst intricate and captivating furniture made just for them. In this article, discover the joy of creating your very own DIY fairy garden furniture. From tiny tables and chairs to delicate swings and benches, learn how to bring your imagination to life and transform your garden into a magical oasis for these mythical creatures. Get ready to unleash your creativity and embark on a journey of crafting wonderment.

Materials Needed
Creating your own DIY fairy garden furniture is an exciting and rewarding project that will add a touch of whimsy and charm to your outdoor space. To get started, gather the following materials:
Wood
Wood is the primary material you’ll need to build the furniture. Opt for a sturdy and weather-resistant wood, such as cedar or teak, to ensure the longevity of your creations. You can find various sizes and types of wood at your local hardware store or online.
Nails and Screws
Nails and screws will be essential for assembling the furniture pieces. Choose ones that are appropriate for the thickness of the wood you’re using. It’s always good to have a variety of sizes on hand to accommodate different joints and fastening needs.
Paint
Paint will bring life to your fairy garden furniture and allow you to personalize it according to your taste. Acrylic paints work well for this project, as they are versatile, easy to use, and come in a wide range of vibrant colors.
Brushes
To apply the paint smoothly and achieve the desired finish, you’ll need a set of paintbrushes in different sizes. Choose brushes with soft bristles for better control.
Sandpaper
Sandpaper is crucial for creating smooth edges and surfaces on your wooden furniture pieces. Look for medium-grit sandpaper, which provides a good balance between removing imperfections and maintaining the wood’s integrity.
Drill
A drill will come in handy when you need to pre-drill screw holes to prevent the wood from splitting. Make sure you have the appropriate drill bits for the size of screws you’re using.
Saw
A saw is necessary for cutting the wood to the desired shape and size. Depending on your comfort level and the complexity of your design, you can choose either a hand saw or a power saw. Consider using a miter or coping saw for more precise cuts.
Measuring Tape
Accurate measurements are key to achieving well-fitting furniture pieces. Keep a measuring tape on hand to ensure the dimensions of your design are precise.
Clamps
Clamps are useful for securing pieces of wood together while they dry or while you’re attaching them with nails or screws. Having a variety of clamps in different sizes will be beneficial for this project.
Safety Gear
For any woodworking project, it’s important to prioritize safety. Wear protective gear such as safety glasses, gloves, and a mask to protect yourself from any potential hazards.
Now that you have your materials ready, let’s move on to the steps involved in creating your DIY fairy garden furniture.
Step 1: Gather Inspiration
Before diving into the project, take some time to gather inspiration for your fairy garden furniture. Look for ideas online or in magazines to get a sense of different styles, designs, and themes. Researching fairy garden furniture will give you a wealth of creative options and help you envision what you want to create.
Once you have a sense of the overall style and aesthetic you’re aiming for, it’s time to create a design plan. Sketch out your ideas, noting the dimensions and specific details of each piece of furniture. This plan will serve as a guide throughout the project, ensuring that you stay organized and focused on your vision.

Step 2: Selecting the Right Wood
Choosing the right wood is crucial for the durability and sustainability of your fairy garden furniture. Consider the following factors when selecting your wood:
Choose a Resistant Wood
Since your fairy garden furniture will likely be exposed to the elements, it’s essential to choose a wood that can withstand outdoor conditions. Cedar, teak, and redwood are popular choices for their natural resistance to rot, insects, and decay.
Consider the Size and Thickness
The size and thickness of the wood will depend on your design plan and the intended purpose of the furniture. Thicker pieces of wood will provide more stability, while thinner pieces can add delicate details. Keep in mind the weight and scale of your furniture in relation to the rest of your fairy garden.
Look for Eco-friendly Options
If you’re conscious of the environmental impact of your choices, consider using reclaimed or sustainably sourced wood. Upcycling old furniture or using salvaged wood from construction sites can add a unique touch to your fairy garden while reducing waste.
Step 3: Cutting the Wood
With your design plan and selected wood in hand, it’s time to start cutting the pieces for your fairy garden furniture. Follow these steps for a successful cutting process:
Measure and Mark the Wood
Using your measuring tape, mark the dimensions of each piece on the wood. Double-check your measurements to ensure accuracy and make adjustments as needed. Take your time during this step, as precise measurements will result in furniture that fits together seamlessly.
Use a Saw to Cut the Pieces
Once you’ve marked your measurements, carefully cut the wood using a saw. If you’re using a power saw, be sure to follow the manufacturer’s instructions for safe operation. If you’re using a hand saw, maintain a steady and controlled motion to achieve clean cuts. Take breaks if needed to prevent fatigue and maintain accuracy.
Smooth the Edges with Sandpaper
After cutting the pieces, use sandpaper to smooth any rough edges or surfaces. Sanding will also help create a consistent texture across all your wooden elements. Take care to sand in the direction of the wood grain for the best results. Wipe away any sawdust with a clean cloth before proceeding to the next step.

Step 4: Assembling the Furniture
Now that you have all your wooden pieces ready, it’s time to assemble your fairy garden furniture. Follow these steps for a sturdy and long-lasting construction:
Lay Out the Pieces
Before attaching any pieces together, lay them out on a flat surface to ensure they fit together as intended. This step allows you to make any necessary adjustments before committing to permanent connections.
Pre-drill Screw Holes
To prevent the wood from splitting, it’s important to pre-drill screw holes before attaching the pieces. Use a drill bit that matches the size of your screws, and drill into the marked spots. Take care not to drill too deeply to avoid damaging the wood.
Use Nails or Screws to Securely Attach the Pieces
Depending on your design and personal preference, you can use either nails or screws to attach the pieces together. Nails are suitable for smaller and less weight-bearing connections, while screws provide more stability. Use a hammer or a screwdriver to fix the fasteners in place, making sure they are straight and flush with the wood surface.
Use Clamps for Extra Support
If needed, use clamps to hold the pieces together while the glue dries or while you’re attaching them with nails or screws. Clamps can provide additional support and ensure strong and secure joints. Remember to remove the clamps once everything is securely in place.
Step 5: Adding Details and Decorations
Now that your furniture is assembled, it’s time to add some decorative touches to make it truly enchanting. Consider the following steps to add whimsy and character to your fairy garden furniture:
Paint the Furniture
Using your chosen acrylic paints and brushes, apply vibrant colors to your furniture pieces. Let your creativity shine as you paint intricate designs, patterns, or even miniature landscapes. Experiment with different techniques such as dry brushing or sponging to achieve the desired effects. Allow the paint to dry thoroughly before moving on to the next step.
Add Tiny Decorative Accents
To add even more charm to your fairy garden furniture, consider adding tiny decorative accents. These can include miniature flowers, faux gemstones, or even tiny figurines. Glue these accents onto your furniture using a high-quality adhesive, ensuring they are secure and won’t pose a choking hazard to birds or other animals that may visit your garden.
Consider Staining or Varnishing the Wood
If you prefer a more natural look for your fairy garden furniture, you can opt to stain or varnish the wood instead of painting it. Stains and varnishes will protect the wood while enhancing its natural beauty. Choose a product specifically designed for outdoor use to ensure longevity.

Step 6: Reveal and Place in Fairy Garden
With your DIY fairy garden furniture complete, it’s time to unveil it and find the perfect spot in your fairy garden. Follow these final steps to showcase your creations:
Carefully Remove Clamps
If you used clamps during the assembly process, carefully remove them now that the glue has dried or the joints are secure. Take your time and ensure that all connections are strong and stable before proceeding.
Position the Furniture in the Fairy Garden
Place your furniture in the desired location within your fairy garden. Consider the scale and aesthetic of your garden and arrange the furniture accordingly. You may want to create a cozy seating area or a whimsical dining space for the fairies to enjoy.
Arrange Other Fairy Garden Accessories Around It
Enhance the magical atmosphere of your fairy garden by incorporating other accessories around your furniture. Miniature flower pots, fairy lights, and tiny pathways can all add an extra touch of enchantment. Have fun experimenting with different elements to create a captivating fairy world.
Additional Tips
Here are some additional tips to consider as you embark on your DIY fairy garden furniture project:
Take Safety Precautions
When working with power tools, sharp objects, or toxic materials, it’s essential to prioritize safety. Always wear the appropriate protective gear, such as safety glasses, gloves, and a mask, to protect yourself from potential injuries or health hazards. Work in a well-ventilated area and follow all safety guidelines provided by the tool and material manufacturers.
Use Non-toxic Paint and Finishes
To ensure the safety of the creatures that may visit your fairy garden, opt for non-toxic paint and finishes. Look for paints that are labeled as safe for children or outdoor use and avoid any products that contain harmful chemicals. This way, you can enjoy your fairy garden without worrying about the well-being of wildlife or pets.
Experiment with Different Designs
Don’t be afraid to unleash your creativity and experiment with different designs for your fairy garden furniture. Explore various styles, shapes, and colors to find what resonates with your vision. Be open to trying new techniques and materials to add variety and interest to your creations.
Consider Adding Cushions or Upholstery
For added comfort and visual appeal, consider adding cushions or upholstery to your fairy garden furniture. Tiny pillows or soft-textured fabric can bring coziness to seating areas or create a soft bed for the fairies. Just ensure that the materials you use are suitable for outdoor use and won’t be damaged by moisture or sunlight.

Conclusion
Congratulations! You’ve successfully created your own DIY fairy garden furniture. By following these steps and using your creativity, you’ve transformed ordinary pieces of wood into whimsical and enchanting creations for your outdoor space. The process of designing, cutting, assembling, and decorating the furniture has allowed you to express your unique style and bring a touch of magic to your garden.
Now that your fairy garden furniture is complete, take a moment to admire your handiwork. Sit back, relax, and enjoy the sight of fairies frolicking among your charming creations. But don’t stop here – continue exploring the realm of DIY fairy gardens and discover other imaginative projects to further enhance your outdoor oasis. The possibilities are endless, and your garden is now a magical wonderland waiting to be explored.


