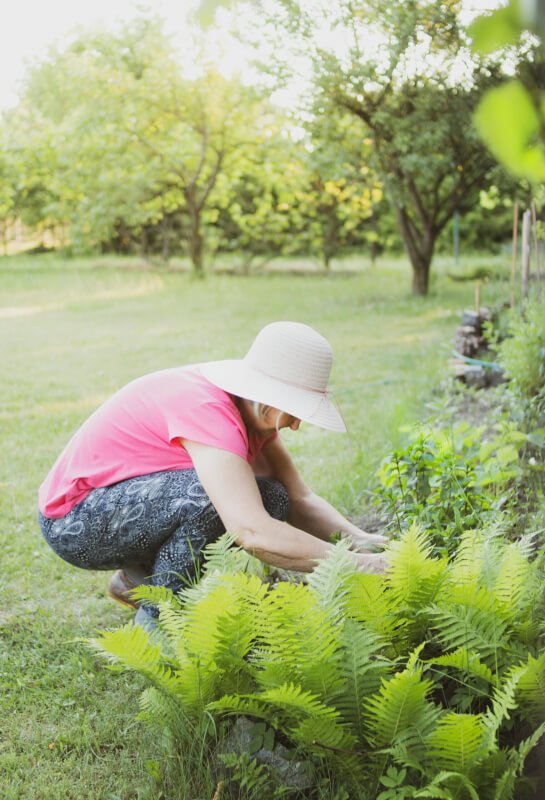
Imagine having a beautiful garden filled with vibrant flowers and lush greenery, all thriving and blooming under the loving care of your very own garden irrigation system. In this article, we will guide you through the process of creating your very own DIY garden irrigation system. Say goodbye to hours spent lugging around heavy watering cans or forgetting to water your plants altogether. With our simple and effective techniques, you’ll be able to keep your garden looking its best all year round, with minimal effort on your part. So, grab your gardening gloves and get ready to transform your garden into a haven of beauty and abundance!

Choosing the Right System
Determine your garden’s needs
When choosing a garden irrigation system, it’s important to first consider the specific needs of your garden. Take into account the size and layout of your garden, as well as the types of plants you are growing. Some plants may require more water than others, so understanding their water requirements will help determine the best irrigation system for your garden.
Consider the available water source
Next, consider the available water source for your garden irrigation system. This could be a municipal water supply, well water, or even rainwater harvesting. The type of water source will determine the type of equipment and fittings you will need for your irrigation system. It’s important to ensure that there is a sufficient and reliable water supply for your garden’s needs.
Evaluate your budget
Lastly, before choosing a garden irrigation system, evaluate your budget. Irrigation systems can vary in cost depending on the complexity and size of your garden. Consider how much you are willing to invest in your irrigation system and choose a system that best fits your budget. Remember, investing in a good quality system will ensure efficient and effective watering for your garden in the long run.
Planning the Layout
Map out your garden
Once you have determined the needs of your garden and evaluated your budget, it’s time to start planning the layout of your irrigation system. Begin by mapping out your garden on paper, taking note of any existing plants, structures, or obstacles. This will help you determine the best placement for your irrigation system components.
Identify key watering zones
Next, identify the key watering zones in your garden. These zones are areas that require specific watering needs, such as flower beds, vegetable gardens, or lawns. By identifying these zones, you can design your irrigation system to deliver the right amount of water to each area, ensuring optimal growth and health for your plants.
Consider different types of irrigation methods
When planning the layout of your garden irrigation system, consider different types of irrigation methods. There are several options to choose from, including drip irrigation, spray irrigation, and sprinkler systems. Each method has its own benefits and drawbacks, so choose the one that best suits your garden’s needs and your personal preferences.

Gathering Materials
Obtain necessary tools
Before you can start installing your garden irrigation system, you will need to gather the necessary tools. This may include items such as shovels, a tape measure, pipe cutters, and a trenching tool. Having the right tools on hand will make the installation process much smoother and more efficient.
Select the right pipes and fittings
Choosing the right pipes and fittings is essential for a successful garden irrigation system. Consider the water pressure in your area and the specific needs of your garden when selecting the appropriate pipe diameter. Additionally, make sure to choose fittings that are compatible with the type of pipe you are using to ensure a secure and leak-free connection.
Choose appropriate emitters and sprinklers
When selecting emitters and sprinklers for your garden irrigation system, consider the type of plants and the watering needs of each watering zone. Different plants may require different types of emitters to deliver water efficiently, while sprinklers are ideal for large areas that require even coverage. Take the time to research and choose the appropriate emitters and sprinklers for your specific garden needs.
Installing the Water Source
Locate a suitable water source
Locating a suitable water source is crucial for the proper functioning of your garden irrigation system. Determine the best location for the water source based on its proximity to your garden and the ease of access. Whether it is a faucet, rainwater barrel, or well, make sure the water source is easily accessible and provides sufficient water flow for your irrigation system.
Install a backflow preventer
To prevent backflow and contamination of your water source, it is important to install a backflow preventer. This device ensures that water flows in one direction, preventing any contaminants from entering the main water supply. Install the backflow preventer near the water source and connect it to the mainline of your irrigation system.
Connect the mainline
Once the backflow preventer is in place, connect the mainline of your irrigation system to the water source. Use appropriate connectors and fittings to ensure a secure and leak-free connection. The mainline will distribute water to the rest of your garden irrigation system, so it is important to ensure proper and reliable connectivity.

Laying the Pipeline
Dig trenches for the pipes
To lay the pipeline for your garden irrigation system, you will need to dig trenches in the designated areas. The depth and width of the trenches will depend on the type of pipe you are using and the recommended specifications. Use a trenching tool or shovel to excavate the trenches, making sure to leave enough space for the pipes and fittings.
Attach pipes and fittings
Once the trenches are dug, it’s time to attach the pipes and fittings. Start by laying out the pipes along the trenches, making sure they are properly aligned. Connect the pipes using the appropriate fittings, ensuring a secure and watertight connection. Take your time in this step to ensure the pipes and fittings are properly installed, as any leaks or loose connections can affect the overall performance of your irrigation system.
Install valves and pressure regulators
To control the flow of water in your garden irrigation system, it is necessary to install valves and pressure regulators. Valves allow you to shut off water to specific zones, while pressure regulators ensure that the water pressure remains consistent throughout the system. Install these components at strategic points along the mainline, as well as in each watering zone, to have full control over your irrigation system.
Installing Emitters and Sprinklers
Select and place emitters
When installing emitters for your garden irrigation system, consider the specific needs of each plant and watering zone. Drip emitters are ideal for individual plants, providing a slow and steady drip of water directly to the root zone. Place emitters close to the base of the plants to ensure efficient watering and avoid water wastage.
Choose and install sprinklers
For larger areas that require even coverage, sprinklers are the ideal choice. Choose sprinklers that can provide the right amount of water and coverage for your specific garden needs. Install the sprinklers strategically, taking into account the layout of your garden and the watering requirements of each zone. Ensure that the sprinklers are properly aligned and adjusted to avoid over- or under-watering.
Consider drip irrigation for specific areas
In addition to using emitters and sprinklers, consider incorporating drip irrigation in specific areas of your garden. Drip irrigation is a method that delivers water directly to the root zone of plants, minimizing water wastage and ensuring efficient watering. This method is particularly beneficial for areas with high water requirements or delicate plants that may be prone to overwatering.

Setting Up Timers and Controllers
Choose a suitable timer/controller
To automate the watering process and ensure consistent watering for your garden, it is important to choose a suitable timer/controller. There are various options available, ranging from basic mechanical timers to advanced smart controllers. Consider your specific needs and budget when selecting a timer/controller that best suits your requirements.
Connect the system to electricity
Once you have chosen a timer/controller, it’s time to connect your garden irrigation system to electricity. Follow the manufacturer’s instructions for proper electrical connection, ensuring that all safety precautions are taken. If you are not experienced with electrical work, it is advisable to seek professional assistance to ensure a safe and proper installation.
Program the watering schedule
After connecting your garden irrigation system to electricity, program the watering schedule on your timer/controller. Take into account the specific watering needs of each zone as well as any local watering restrictions. Set the timer/controller to water at the appropriate times and durations to ensure optimal plant health and water efficiency.
Implementing Maintenance Practices
Regularly inspect and clean the system
To keep your garden irrigation system in optimal working condition, it is important to regularly inspect and clean the system. Check for any leaks, damaged pipes, or clogged emitters or sprinklers. Clean or replace any components as necessary to ensure consistent water flow and proper functioning of the system.
Adjust watering schedule as needed
As your garden grows and changes throughout the seasons, it may be necessary to adjust the watering schedule of your irrigation system. Monitor the moisture levels in your garden and the overall health of your plants to determine if any adjustments are needed. This will help prevent overwatering or underwatering, ensuring optimal plant growth and health.
Protect the system during winter
During the winter months, it is important to protect your garden irrigation system from freezing temperatures. Drain the system to remove any water that could expand and cause damage to the pipes or fittings. Insulate any exposed pipes or components to prevent freezing. Proper winterization will help prolong the lifespan of your irrigation system and prevent costly repairs in the future.

Troubleshooting Common Issues
Identify and fix leaks
Leakage is a common issue in garden irrigation systems, but it can be easily identified and fixed. Check for any signs of water pooling, soggy areas, or dripping connections. Identify the source of the leak and repair it by replacing the affected component or sealing any loose connections. Regularly inspecting and addressing leaks will help maintain the efficiency and effectiveness of your irrigation system.
Address low water pressure problems
Low water pressure can affect the performance of your garden irrigation system, leading to inadequate watering. Check for any obstructions in the pipes and fittings, such as debris or mineral buildup. Clear any blockages to improve water flow and pressure. If low water pressure persists, consider consulting a professional to assess and address the issue.
Resolve clogged emitters or sprinklers
Clogged emitters or sprinklers can result in uneven watering or complete failure of certain zones in your garden. Regularly inspect and clean the emitters and sprinklers to remove any debris or mineral buildup. If cleaning does not resolve the issue, consider replacing the affected components. Proper maintenance and cleaning will ensure that your garden receives the necessary water for healthy and thriving plants.
Expanding and Improving the System
Expand irrigation coverage
If you find that your current garden irrigation system does not cover all areas of your garden, consider expanding its coverage. This can be done by adding additional pipes, fittings, and emitters to reach previously unwatered areas. Take into account the water requirements of the new areas and adjust your watering schedule as necessary to ensure proper irrigation.
Upgrade to smart irrigation technology
For added convenience and water efficiency, consider upgrading your garden irrigation system to smart irrigation technology. Smart controllers use weather data and soil moisture sensors to automatically adjust the watering schedule based on real-time conditions. This ensures that your garden receives the right amount of water at the optimal times, reducing water waste and saving you time and effort.
Consider rainwater harvesting
To further enhance the sustainability of your garden irrigation system, consider incorporating rainwater harvesting. Rainwater can be collected and stored in barrels or tanks, and then used to supplement or even replace your existing water source. This not only conserves water but also reduces your reliance on municipal or well water. Install a rainwater collection system and connect it to your irrigation system for a more environmentally friendly watering solution.
In conclusion, creating a DIY garden irrigation system is a rewarding and beneficial project for any gardener. By following the outlined steps and considering the specific needs of your garden, you can design and install an efficient and effective irrigation system. Regular maintenance and troubleshooting will help ensure the longevity and performance of your system. With a well-designed and properly installed irrigation system, you can enjoy a lush and healthy garden while conserving water and reducing manual watering efforts.
