If you’ve always wanted to try your hand at gardening but lack the space for a traditional garden bed, fret not! In this article, you’ll discover a step-by-step guide on how to build your very own raised garden planter boxes. These handy structures not only provide a practical solution for gardening in limited spaces but also add a charming touch to your outdoor area. Whether you’re a seasoned green thumb or a complete novice, this simple DIY project will have you growing your favorite plants, herbs, and vegetables in no time. So grab your tools and let’s get started on creating the garden of your dreams!
Materials and Tools
Choosing the Right Materials
When choosing materials for your raised garden planter boxes, it’s important to consider their durability and resistance to weather elements. Opt for materials that are rot-resistant, such as cedar or redwood, as they will last longer and require less maintenance. You can also use pressure-treated lumber, but be cautious of any chemicals that may leach into the soil.
Essential Tools
To build your own raised garden planter boxes, you will need a few essential tools. These include a tape measure, a circular saw or miter saw for cutting boards, a drill or screwdriver for assembling the frame, and a level to ensure everything is straight and balanced. Additionally, you will need screws or nails to secure the boards together, a hammer for any necessary adjustments, and a shovel for filling the planter.
Optional Tools
While not essential, there are some optional tools that can make the construction process easier. If you have access to a table saw, it can come in handy for cutting boards with precision. A power drill can speed up the assembly process, especially when using screws. If you plan on adding a bottom to your planter, a staple gun can help secure the material. Lastly, having a sander or sandpaper can be useful for smoothing out any rough edges.
Design Considerations
Determining the Size and Shape
Before starting the construction, you need to determine the size and shape of your raised garden planter boxes. Consider the available space in your garden and how much room you want for plants to grow. Keep in mind that taller beds may require more maintenance, while wider beds offer more planting space. Take into account your own physical abilities and the best height for comfortable gardening.
Selecting a Style
Raised garden planter boxes come in different styles and designs, so choose one that aligns with your taste and the overall aesthetic of your garden. Whether you prefer a simple and clean look or a more intricate design, there are numerous options available. Consider the materials you have chosen and how they will complement the surrounding environment. The style you select should enhance the beauty of your garden.
Considering Accessibility
Accessibility is an important factor to consider when designing your raised garden planter boxes. If you have limited mobility or are in a wheelchair, building a taller planter may be more convenient for you. Ensure that you can comfortably reach all areas of the planter for planting, watering, and maintenance. If necessary, you can incorporate features such as wide ledges or built-in seating to make gardening more accessible and enjoyable.

Building the Base
Measuring and Marking
To begin constructing your raised garden planter box, start by measuring and marking the area where the base will be placed. Use a tape measure to determine the desired length and width of the planter box. Mark the corners and create a straight line using a straightedge or string to ensure accuracy.
Cutting the Boards
Using a circular saw or miter saw, cut the boards according to the measurements you have marked. Make sure to cut them at a 90-degree angle for clean and tight joints. Take your time to ensure precise cuts, as this will affect the overall stability and appearance of the planter box.
Assembling the Frame
Once the boards are cut, begin assembling the frame of the planter box. Lay out the boards according to the desired shape and size of the planter. Use screws or nails to connect the boards at the corners, ensuring they are tightly secured. Use a level to check that the frame is straight and adjust as needed. Double-check all joints to ensure the frame is sturdy before proceeding.
Constructing the Walls
Cutting and Attaching the Side Boards
With the frame in place, you can now cut and attach the side boards of the planter box. Measure the length of the distance between the two opposite sides and cut the boards accordingly. Align the boards with the top edges of the frame and attach them with screws or nails, ensuring a snug fit. Repeat this process for all sides, securely fastening each board to the frame.
Adding the Corner Braces
To further strengthen the walls of the planter box, consider adding corner braces. Cut the braces to fit the height of the planter, typically around 1 to 2 feet in length. Attach the braces to the corner joints using screws, making sure they are tightly secured. This will prevent any wobbling or shifting of the walls and maintain the stability of the planter box over time.
Optional: Adding a Bottom
While not necessary, adding a bottom to your raised garden planter box can provide additional support and prevent soil erosion. Measure the dimensions of the planter and cut a piece of plywood or landscaping fabric to fit. Attach it to the bottom of the frame using a staple gun for plywood or by wrapping and securing the fabric around the edges. This will help retain moisture and keep the soil contained.

Preparing the Planter for Planting
Lining the Interior
To protect the wood and extend the lifespan of your raised garden planter box, line the interior with a plastic sheet or landscape fabric. Cut the lining to fit the dimensions of the planter and smooth it along the walls and bottom, overlapping at the corners if necessary. The lining will create a barrier between the soil and the wood, preventing direct contact and potential rotting.
Creating Drainage Holes
Proper drainage is essential for the health of your plants, so you’ll want to create drainage holes in the bottom of your planter. Use a drill with a bit size appropriate for the desired hole diameter. Space the holes evenly across the bottom, ensuring there are enough for adequate drainage without compromising the structural integrity of the planter box.
Optional: Applying a Protective Finish
If you prefer a more polished look or want to protect the wood from weathering, consider applying a protective finish to your raised garden planter box. Choose a non-toxic sealant or paint specifically made for exterior use. Apply the finish according to the manufacturer’s instructions, allowing sufficient drying time before filling the planter with soil.
Filling the Planter
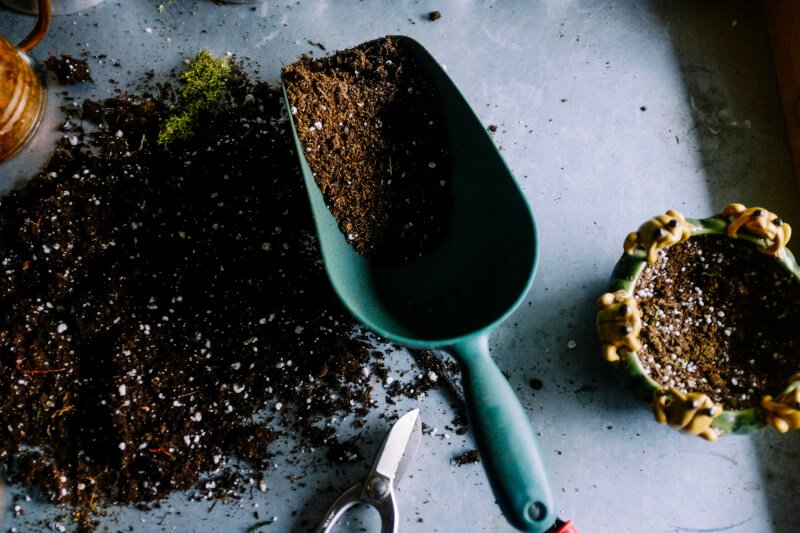
Choosing the Right Soil
Selecting the right soil is crucial for the success of your raised garden planter box. Opt for a high-quality potting mix that is rich in organic matter and well-draining. Avoid using garden soil, as it tends to compact and restrict root growth. Consider the type of plants you will be growing and choose a soil mix that meets their specific needs, such as a sandy mix for succulents or a loamy mix for vegetables.
Adding Amendments and Fertilizers
To ensure optimal plant growth and health, you may need to amend the soil with fertilizers or organic matter. Assess the nutrient requirements of the plants you will be growing and incorporate appropriate amendments. This can include adding compost, well-decomposed manure, or slow-release fertilizers. Mix the amendments into the soil thoroughly to ensure an even distribution of nutrients.
Filling the Planter
With the soil prepared and any necessary amendments added, it’s time to fill the planter. Start by adding a layer of soil to cover the bottom, ensuring it is evenly spread. Place plants in their designated locations, making sure to space them according to their recommended spacing requirements. Fill in the remaining space with soil, gently firming it around the roots of the plants. Leave about an inch of space at the top to allow for watering.

Planting and Maintenance
Selecting the Right Plants
When selecting plants for your raised garden planter box, consider their compatibility with the growing conditions and the aesthetic appeal you desire. Choose plants that have similar sunlight and watering requirements to simplify maintenance. Take into account the mature size of the plants and ensure they have enough room to grow. Incorporate a variety of plants for a diverse and visually pleasing garden.
Planting in the Planter
Carefully remove the plants from their containers and gently loosen the roots. Dig a hole in the soil of the planter box that is wide and deep enough to accommodate the plant’s root ball. Place the plant in the hole, ensuring it sits at the same level as it was in its original container. Backfill the hole with soil, gently firming it around the plant to provide stability. Repeat this process for each plant.
Watering and Caring for the Plants
Proper watering is crucial for the health and growth of the plants in your raised garden planter box. Monitor the moisture levels regularly and water accordingly, ensuring the soil remains moist but not soggy. Use a watering can or a gentle spray setting on a hose to avoid displacing the soil or damaging the plants. Additionally, regularly monitor the plants for pests, diseases, and signs of nutrient deficiencies, and take appropriate action to address any issues that arise.
Troubleshooting and Tips
Preventing Weeds
To prevent weeds from encroaching on your raised garden planter box, consider applying a layer of mulch on top of the soil. Mulch helps suppress weed growth by blocking sunlight and inhibiting weed seed germination. Organic mulch, such as wood chips or straw, is an excellent choice as it also helps retain moisture and provides nutrients as it breaks down.
Managing Pests
Pests can be a nuisance in any garden, but there are ways to manage them in your raised garden planter box. Regularly inspect the plants for signs of pests, such as insect damage or chewed leaves. Use organic pest control methods, such as handpicking or introducing beneficial insects, to keep pest populations in check. Consider companion planting to deter pests, as certain plants can repel or attract beneficial insects.
Maintaining Moisture Levels
Maintaining proper moisture levels in your raised garden planter box is essential for plant health and productivity. Monitor the moisture levels regularly and adjust watering accordingly. Consider using a self-watering system or installing drip irrigation to ensure consistent and efficient watering. Mulching the soil surface can also help retain moisture and reduce the frequency of watering.

Expanding or Modifying Your Planter
Adding Trellises or Supports
If you plan on growing climbing plants or vining vegetables in your raised garden planter box, adding trellises or supports can maximize space and productivity. Install trellises or stakes securely in the ground or attach them to the sides of the planter box. Choose materials that are sturdy and capable of supporting the weight of the plants, such as bamboo or metal poles. Train the plants to grow vertically along the supports for optimal growth.
Building Multiple Tiers
If you find yourself needing more planting space or want to create a visually appealing design, consider building multiple tiers within your raised garden planter box. Measure and cut additional boards to the desired length and height, and assemble them onto the existing box. Secure the tiers together with screws or nails, ensuring a stable structure. This allows for separate planting areas and adds depth to your garden.
Modifying the Design
Feel free to modify the design of your raised garden planter box to suit your specific needs and preferences. Add decorative elements, such as trim or lattice panels, to enhance the aesthetics of the planter. Customize the dimensions to fit available space or accommodate certain plants. Remember to make necessary adjustments to materials and assembly techniques accordingly.
Conclusion
Building your own raised garden planter boxes can be a rewarding and enjoyable project. With the right materials, tools, and design considerations, you can create a functional and beautiful addition to your garden. By following the step-by-step process outlined in this article, you’ll be able to construct a sturdy planter box, prepare it for planting, and care for your plants effectively. Whether you’re a seasoned gardener or a beginner, this DIY project will allow you to personalize your gardening experience and reap the benefits of homegrown produce and beautiful flowers.

