Imagine transforming your garden into a charming oasis with the addition of a beautiful DIY garden arbor. With its classic yet rustic appeal, a garden arbor can instantly elevate the aesthetic of your space and create a cozy retreat. In this article, you will discover step-by-step instructions on how to construct your very own DIY garden arbor, allowing you to showcase your creativity and enhance the natural beauty of your outdoor haven. Whether you are a seasoned DIY enthusiast or a novice, this guide will provide you with all the necessary knowledge and inspiration to embark on this fulfilling project. So roll up your sleeves, grab your tools, and let’s get started on building your dream garden arbor!

Selecting the Right Location
Determining the purpose of your garden arbor
When selecting the location for your garden arbor, you must first determine its purpose. Are you looking to create a cozy reading nook, a focal point for your garden, or a shaded area for relaxation? The purpose will help you identify the ideal spot for your arbor.
Considering sunlight and shade
Another important factor to consider is the amount of sunlight and shade in your garden. Some plants thrive in full sun, while others prefer partial shade. By observing your garden’s sun patterns throughout the day, you can determine the best location for your arbor, ensuring your plants thrive in their new environment.
Evaluating the size and scale of your garden
The size and scale of your garden should also be taken into consideration when selecting the location for your arbor. You want to ensure that the arbor does not overpower the garden or look out of place. Take measurements of your garden and consider how the arbor will fit into the overall landscape.
Choosing a suitable spot for your arbor
Once you have determined the purpose, sunlight and shade conditions, as well as evaluated the size and scale of your garden, it’s time to choose a suitable spot for your arbor. Look for a spot that provides a pleasant view, enhances the garden’s aesthetics, and complements the existing elements in your outdoor space.
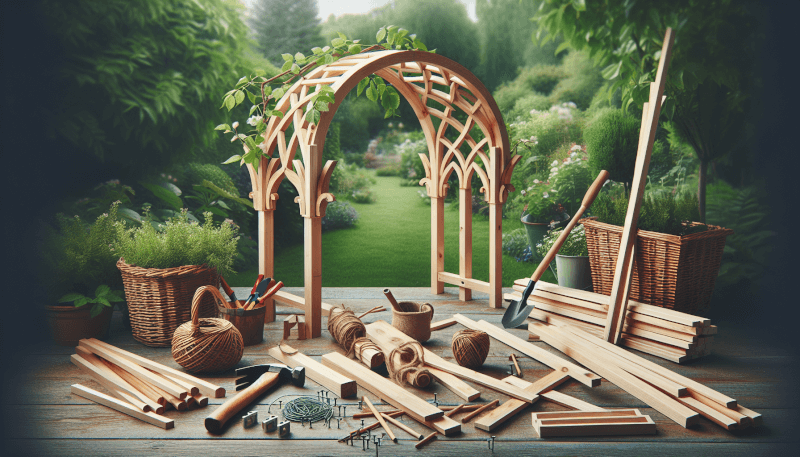
Gathering the Materials and Tools
Making a list of required materials
Before you start building your garden arbor, it’s important to make a list of all the materials you will need. This includes wood for the structure, fasteners and hardware for assembly, and any additional decorative elements you plan to incorporate.
Selecting the right wood for your arbor
Choosing the right wood is crucial to ensure the longevity and stability of your garden arbor. Cedar, redwood, and pressure-treated pine are popular choices due to their durability and resistance to rot. Consider the appearance, cost, and availability of the wood when making your selection.
Choosing appropriate fasteners and hardware
Selecting the right fasteners and hardware is essential for the structural integrity of your garden arbor. Stainless steel screws and galvanized nails are good choices as they are resistant to rust and corrosion. Additionally, consider any decorative hardware or brackets that will enhance the overall aesthetic of your arbor.
Obtaining the necessary tools
To build your garden arbor, you will need a variety of tools. Some essential tools include a circular saw or miter saw for cutting wood, a drill for attaching fasteners, a level for ensuring straightness, and a tape measure for taking accurate measurements. Depending on the complexity of your design, you may also need additional tools such as a jigsaw or chisel.

Designing Your Garden Arbor
Deciding on the style and shape of your arbor
When designing your garden arbor, consider the style and shape that best suits your taste and complements your garden. Popular styles include classic arches, pergola-inspired designs, or even whimsical arbors with intricate details. Think about the overall theme of your garden and select a style that aligns with it.
Sketching or using design software to visualize your arbor
To better visualize your garden arbor, it’s helpful to create a sketch or use design software that allows you to see how the finished product will look. Pay attention to proportions, dimensions, and any additional features you plan to include, such as a trellis or bench.
Determining the dimensions and measurements
Accurate dimensions and measurements are essential for a successful garden arbor. Consider the height, width, and depth of your arbor, as well as the spacing between the posts. Take into account any climbing plants or hanging baskets you plan to incorporate and ensure there is enough space for them to grow.
Considering additional features like trellis or bench
If you’re looking to add extra functionality or visual interest to your garden arbor, consider incorporating additional features such as a trellis or a bench. A trellis allows climbing plants to flourish, while a bench provides a comfortable seating area for you and your guests to enjoy your garden oasis.
Preparing the Ground
Clearing the area of vegetation and debris
Before you can begin building your garden arbor, it’s important to clear the area of any vegetation and debris. Remove any plants, weeds, or grass from the designated spot to create a clean slate for your project. This will also help prevent weeds or grass from growing up through the arbor later on.
Leveling the ground
Ensure that the ground where you plan to install your garden arbor is level. Use a shovel and a level to remove any uneven patches or bumps. A level surface will provide a solid foundation for your arbor and ensure its stability.
Marking the placement of the arbor
Once the ground is clear and level, mark the placement of the arbor by using stakes or spray paint. This will serve as a guide when it’s time to dig the holes for the arbor posts. Double-check the measurements and alignment to ensure everything is accurate before proceeding to the next step.

Building the Arbor Structure
Cutting the posts to the desired height
Start building the structure of your garden arbor by cutting the posts to the desired height. Measure and mark the posts according to your design, then use a saw to cut them to the appropriate length. Make sure all the posts are cut to the same height for a uniform look.
Creating the arbor sides and top
Next, it’s time to create the arbor sides and top. Measure and cut the wood pieces to fit your design, ensuring they align with your dimensions and style choices. This is where your creativity can truly shine, so take your time to carefully craft each piece.
Attaching the side pieces to the posts
Attach the side pieces to the posts by using screws or nails. Make sure to align them properly and securely fasten them to the posts. This step is crucial for the overall stability and strength of your garden arbor.
Joining the top sections together
Join the top sections of your arbor together, whether it’s a single piece or multiple smaller pieces. Use screws or nails to securely fasten the pieces, ensuring they are aligned properly. This will form the arch or canopy of your garden arbor.
Reinforcing the structure
To ensure the structural integrity of your garden arbor, consider reinforcing key areas with additional bracing or supports. This can be done by adding corner brackets, cross beams, or diagonal bracing. Reinforcement will increase the durability of your arbor, especially in areas prone to strong winds or heavy foliage.
Adding Decorative Details
Incorporating decorative cutouts or designs
Add a personalized touch to your garden arbor by incorporating decorative cutouts or designs. Use a jigsaw or other cutting tools to create intricate patterns or shapes on the sides or top of the arbor. This will give your arbor a unique and eye-catching appearance.
Applying a decorative finish or paint
Once the structure is complete, consider applying a decorative finish or paint to enhance the visual appeal of your garden arbor. Choose a finish that complements your garden’s color palette or a paint color that adds a pop of vibrancy. Don’t forget to use weather-resistant products to protect the wood from the elements.
Including climbing plants or flowers
Take advantage of the vertical space your arbor provides by including climbing plants or flowers. Choose species that are suitable for your climate and make sure to provide appropriate support for their growth. As the plants climb and intertwine with the arbor, they will create a stunning natural canopy.
Adding hanging baskets or lanterns
To further enhance the aesthetic of your garden arbor, consider adding hanging baskets or lanterns. Hanging baskets filled with vibrant flowers will add a burst of color, while lanterns can create a cozy ambiance in the evenings. These additional elements will make your garden arbor feel like a truly inviting and magical space.

Installing the Arbor
Ensuring stability and proper alignment
Before installing your garden arbor, double-check its stability and proper alignment. Ensure that all the components are securely attached and there are no loose or wobbly sections. A stable and well-aligned arbor will stand the test of time and continue to be a beautiful addition to your garden.
Digging holes and setting the posts
To install your garden arbor, you will need to dig holes for the posts. Use a post hole digger or an auger to create holes that are deep enough to provide a secure foundation. Place the posts in the holes and fill them with concrete or gravel to hold them in place.
Securing the arbor in place
Once the posts are in the holes and the concrete or gravel has been added, secure the arbor in place. Use a level to ensure it is straight and make any necessary adjustments before the concrete or gravel sets. Allow sufficient time for the concrete or gravel to dry and harden before moving on to the next step.
Checking for level and making adjustments
After the arbor is secured in place, check for levelness one final time and make any adjustments as needed. Use a level across the top and sides of the arbor to ensure it is perfectly level and aligned. These finishing touches will ensure a professional and polished look for your garden arbor.
Applying Finishing Touches
Sanding any rough edges
To achieve a smooth and polished finish for your garden arbor, sand any rough edges or surfaces. Use sandpaper or a sanding block to gently smooth out the wood, paying attention to details like corners and joints. This step will give your arbor a professional and refined appearance.
Applying wood stain or sealant for protection
Protect your garden arbor from the elements by applying a wood stain or sealant. This will not only enhance the natural beauty of the wood but also provide a layer of protection against moisture, UV rays, and rot. Follow the manufacturer’s instructions for proper application and drying time.
Polishing metal hardware
If your garden arbor features metal hardware or brackets, take the time to polish them for a clean and shiny look. Use a metal polish and a soft cloth to remove any dirt or oxidation, restoring the hardware to its original luster. This small detail will elevate the overall aesthetic of your garden arbor.
Cleaning the surrounding area
Before completing your garden arbor project, take a moment to clean the surrounding area. Remove any construction debris, tools, or leftover materials. Sweep the ground and adjust any plants or flowers that may have been disturbed during the installation process. A clean and tidy area will showcase your garden arbor as the focal point of your outdoor space.

Maintaining Your Garden Arbor
Regularly inspecting for damage or rot
To ensure the longevity of your garden arbor, make it a habit to regularly inspect it for any signs of damage or rot. Look for cracks, loose fasteners, or areas that show signs of decay. Catching these issues early on will allow you to make the necessary repairs and prevent further damage to your arbor.
Repairing any loose or broken components
If you notice any loose or broken components during your inspection, take the time to repair them promptly. Tighten screws, nails, or bolts that may have come loose and replace any damaged or rotten wood pieces. Addressing these issues early on will maintain the structural integrity of your arbor.
Applying a fresh coat of paint or finish
Over time, the paint or finish on your garden arbor may fade or become weathered. To keep your arbor looking fresh and vibrant, consider applying a fresh coat of paint or finish every few years. This will not only enhance its appearance but also provide additional protection against the elements.
Trimming and pruning climbing plants
If you have climbing plants growing on your garden arbor, regular maintenance is important to prevent them from becoming overgrown and overwhelming the structure. Trim and prune the plants as needed, removing any dead or excessive growth. This will keep the arbor looking neat and tidy, while also promoting the health of the plants.
Enhancing Your Garden with Accessories
Choosing suitable furniture for the arbor
To truly create a cozy and inviting space, consider adding suitable furniture to your garden arbor. Select chairs, benches, or tables that blend well with the style of your arbor and provide comfort for relaxing or entertaining guests. Choose materials that are weather-resistant and easy to clean for long-lasting enjoyment.
Adding cushions or pillows for comfort
Enhance the comfort of your garden arbor furniture by adding cushions or pillows. Choose fabrics and designs that complement your outdoor decor and add a touch of personal style. Waterproof or weather-resistant materials will ensure these accessories can withstand the elements and remain beautiful for years to come.
Placing potted plants or flower arrangements
To further enhance the beauty of your garden arbor, place potted plants or flower arrangements around its base or on nearby surfaces. Select plants that thrive in your climate and coordinate with the colors and theme of your garden. The addition of foliage and blooms will bring life and vibrancy to your arbor.
Installing outdoor lighting
Illuminate your garden arbor and create a magical ambiance by installing outdoor lighting. Options include string lights, lanterns, or even solar-powered fixtures. Not only will this lighting allow you to enjoy your arbor after dark, but it will also highlight its beauty and add a touch of enchantment to your outdoor space.
Building your own DIY garden arbor is a rewarding project that allows you to create a stunning focal point in your outdoor space. By carefully selecting the location, gathering the necessary materials and tools, designing the arbor to suit your style, and paying attention to detail during installation, you can bring your vision to life. With proper maintenance and the addition of accessories, your garden arbor will become a beloved feature that enhances your garden for years to come.
