If you’re looking to embark on a gardening adventure but don’t have much space or simply want a more convenient way to cultivate your plants, building a raised garden bed might just be the perfect solution for you. This article will guide you through the step-by-step process of creating your own raised garden bed, allowing you to easily grow your favorite flowers, herbs, or vegetables in a compact and efficient manner. So get ready to dig in and discover the joys of building and tending to your very own raised garden bed!
Materials Needed
To build a raised garden bed, you will need the following materials:
Wooden boards
The main component of your raised garden bed will be wooden boards. Opt for untreated, rot-resistant wood, such as cedar or redwood, to ensure the longevity of your garden bed.
Nails or screws
You will need nails or screws to secure the wooden boards together. Choose galvanized or stainless steel fasteners to prevent rust and extend the life of your garden bed.
Hammer or screwdriver
A hammer or screwdriver will be required to drive nails or screws into the wooden boards. Make sure you have the appropriate tool for your chosen fasteners.
Measuring tape
A measuring tape will come in handy when determining the size of your garden bed and marking the corners. Accurate measurements are crucial for a properly constructed raised bed.
Level
A level will help ensure that your garden bed is evenly constructed and avoids any slopes or uneven surfaces. This will promote proper water drainage and plant growth.
Circular saw
A circular saw will be necessary for cutting the wooden boards to the desired length. This tool will ensure clean and precise cuts for a professional-looking garden bed.
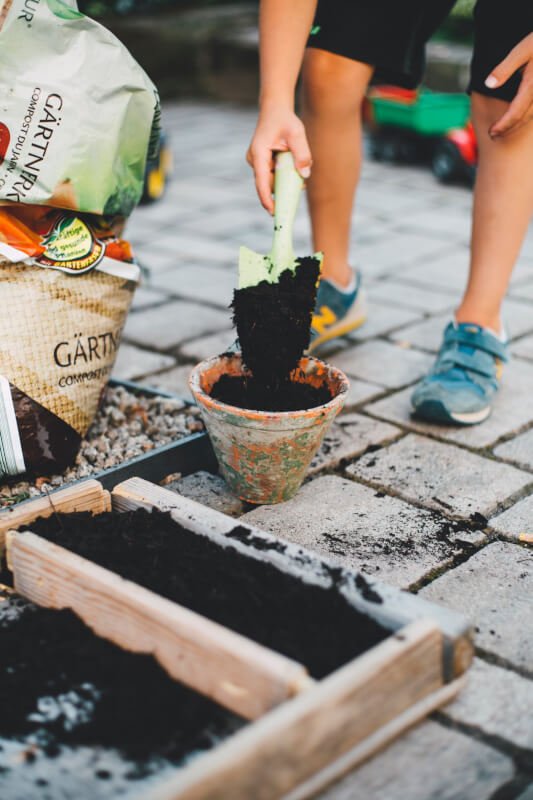
Gardening soil
Having high-quality gardening soil is essential for the success of your raised bed. Look for nutrient-rich soil that is well-draining and suitable for the types of plants you wish to grow.
Compost
Compost is a valuable addition to your gardening soil, as it adds nutrients and improves the soil structure. Consider creating your own compost or purchase it from a local garden center.
Garden tools
Basic gardening tools such as a trowel, shovel, and rake are essential for planting and maintaining your raised garden bed. Have these tools on hand to make your gardening tasks easier.
Landscape fabric
Landscape fabric is used to prevent weeds from growing in your raised garden bed. It acts as a barrier, allowing water and nutrients to penetrate while keeping weeds at bay.
Choosing the Right Location
When selecting a location for your raised garden bed, there are several factors to consider:
Sunlight exposure
Most plants require at least six hours of direct sunlight each day to thrive. Therefore, choose a location that receives ample sunlight throughout the day, preferably with southern or western exposure.
Accessibility
Ensure that the garden bed is easily accessible for planting, watering, and harvesting. Consider the distance from your house and other structures, as well as any obstacles that may hinder access.
Water drainage
Adequate water drainage is crucial for the health of your plants. Avoid low-lying areas that tend to become waterlogged. If needed, incorporate proper drainage measures, such as adding gravel or creating a slight slope.
Proximity to water source
Having a water source nearby will make watering your raised bed more convenient. Consider the proximity to an outdoor faucet or an alternative water supply, such as a rain barrel or hose.
Measuring and Marking
Before you start building your raised garden bed, it is important to measure and mark the desired size accurately.
Determining the size
Decide on the dimensions of your garden bed, taking into account the available space and your gardening needs. Consider both length and width, keeping in mind that wider beds are easier to maintain and access.
Marking the corners
Using your measuring tape, mark the corners of your garden bed using stakes or spray paint. Make sure the corners are square by measuring equal distances from each corner stake.
Preparing the Ground
Preparing the ground is a crucial step in ensuring the stability and longevity of your raised garden bed.
Clearing the area
Remove any obstacles such as rocks, debris, or existing vegetation from the designated area. This will provide a clean and level surface for your garden bed.
Leveling the ground
Use a rake or shovel to level the ground, removing any bumps or depressions. A level surface will prevent your garden bed from tilting or shifting over time.
Removing grass and weeds
To prevent grass and weeds from encroaching on your raised bed, it is essential to remove them completely. Dig up the sod or use a garden edging tool to create a clear separation.
Laying landscape fabric
Before assembling your garden bed, lay landscape fabric over the cleared ground. This will help suppress weed growth and allow water to penetrate while retaining moisture in the soil.
Constructing the Sides
Now that your ground is prepped, it’s time to construct the sides of your raised garden bed.
Cutting the boards
Using a circular saw, cut the wooden boards to the desired length for each side of your raised bed. Make sure to measure and cut accurately to ensure a neat and cohesive look.
Assembling the sides
Position the cut boards in place, forming the walls of your garden bed. Ensure that the corners are flush and secure them together using nails or screws.
Securing with nails or screws
To ensure stability and longevity, secure the boards together by driving nails or screws through the corners. Place the fasteners at regular intervals along the length of the boards to ensure a secure hold.
Adding the Bottom
Adding a bottom to your raised garden bed helps retain the soil while allowing for proper drainage.
Measuring and cutting the bottom board
Using your measuring tape, measure the dimensions of the interior of your garden bed. Cut a wooden board to fit snugly within these measurements, serving as the bottom of your bed.
Attaching the bottom board
Place the cut board inside the garden bed, resting it on the landscape fabric. Secure the bottom board to the sides of the bed using nails or screws to hold it in place.

Filling the Bed
Now that the structure of your raised garden bed is complete, it’s time to fill it with nutrient-rich soil.
Adding a layer of gravel
To improve drainage and prevent waterlogging, add a layer of gravel at the bottom of your raised bed before adding soil. This will help excess water escape and prevent root rot.
Mixing soil and compost
In a separate area, mix your gardening soil with compost to enhance its fertility and texture. Aim for a ratio of approximately 3:1 soil to compost mixture, ensuring a nutrient-rich growing environment.
Filling the bed with soil mixture
Transfer the soil and compost mixture into your raised garden bed, filling it to the brim. Level the soil surface, ensuring it is evenly distributed and providing a solid foundation for your plants.
Leveling and Smoothing
Before you start planting, take the time to level and smooth the soil surface.
Using a level tool
Place a level tool on top of your raised bed to ensure it is evenly constructed. Adjust any uneven areas by adding or removing soil until the surface is level and even.
Smoothing the surface
Use a rake or gardening trowel to smooth the soil surface, removing any large clumps or debris. This will create a neat and inviting bed for your plants and make planting easier.

Planting and Maintenance
With your raised garden bed prepared, it’s time to start planting and caring for your plants.
Choosing plants
Consider the specific requirements and preferences of the plants you wish to grow. Take into account factors such as sunlight exposure, soil type, and climate to select plants that are well-suited for your raised bed.
Planting seeds or seedlings
Follow planting instructions for the specific plants you have chosen. Prepare small holes in the soil, gently place the seeds or seedlings, and cover them with soil. Water thoroughly after planting.
Watering and fertilizing
Keep your raised garden bed adequately watered, taking care to provide enough moisture without overwatering. Monitor soil moisture levels regularly and adjust watering as needed. Additionally, consider adding organic fertilizers to provide essential nutrients.
Weeding and pruning
Regularly inspect your raised bed for weeds and remove them as soon as they appear. Use a small garden tool to carefully uproot the weeds, taking care not to disturb the roots of your plants. Additionally, prune your plants as needed to promote healthy growth and productivity.
Mulching
Applying a layer of organic mulch, such as wood chips or straw, around your plants will help conserve moisture, suppress weed growth, and regulate soil temperature. Mulching is an effective way to promote plant health and reduce maintenance.
Extending the Growing Season
To maximize your gardening efforts, consider extending the growing season in your raised garden bed.
Adding a hoop house or cold frame
A hoop house or cold frame is a structure that can be placed over your garden bed to protect plants from cold temperatures and frost. This simple addition can prolong the growing season and allow you to grow certain plants throughout the year.
Using row covers
Row covers are lightweight, breathable fabrics that can be placed directly over your plants to protect them from pest infestation and extreme weather conditions. They allow sunlight and rain to penetrate while shielding your crops.
Installing a drip irrigation system
A drip irrigation system is an efficient way to deliver water directly to the root zones of your plants. By reducing water waste and promoting even water distribution, a drip system can help extend the growing season and improve plant health.
Protecting from frost
During cold months, protect your plants from frost by covering them with blankets, burlap, or frost cloth overnight. This extra layer of protection will help prevent frost damage and maintain plant health.
By following these steps, you can successfully build and maintain a raised garden bed. Enjoy the process of nurturing your plants and reaping the rewards of your own homegrown produce. Happy gardening!

