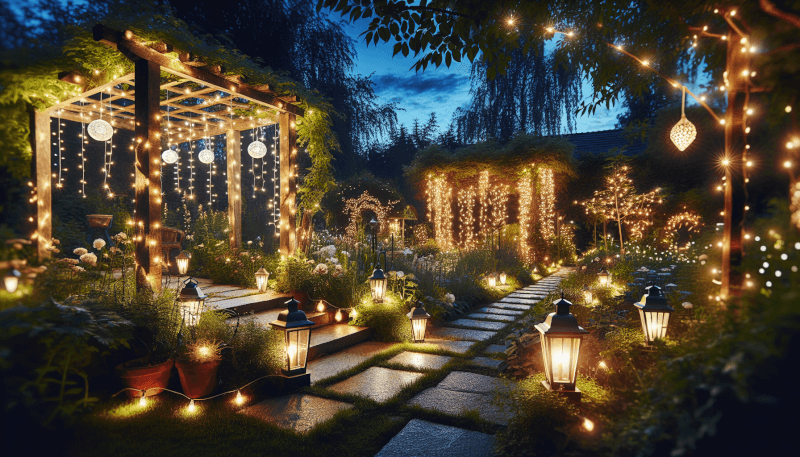
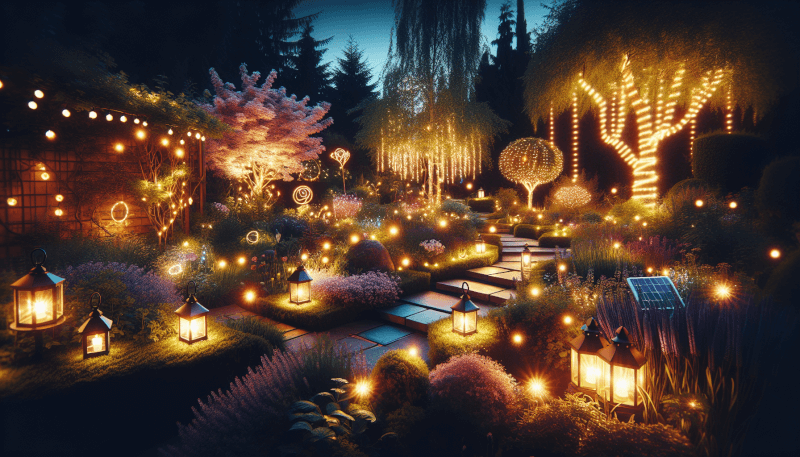
You’re about to discover the most popular DIY garden lighting techniques that will transform your outdoor space into a magical oasis. From fairy lights draped over trees to solar-powered lanterns lining your pathway, these simple and affordable ideas will add a warm and inviting glow to your garden. Get ready to create a cozy atmosphere for evening gatherings and enjoy the enchanting beauty of your illuminated outdoor haven.

Solar Lighting
Using solar-powered garden lights
Solar-powered garden lights are a cost-effective and environmentally friendly way to light up your outdoor space. These lights have a small solar panel that absorbs sunlight during the day and converts it into electricity to power the built-in LEDs. The lights automatically turn on at dusk and off at dawn, making them incredibly convenient. Simply place them in your garden, along pathways, or around your patio to create a warm and inviting atmosphere. With various styles and designs available, you can easily find solar-powered garden lights that will complement your outdoor decor.
Creating solar mason jar lanterns
If you’re looking to add a touch of whimsy to your garden, consider creating solar mason jar lanterns. To make these charming lanterns, you’ll need mason jars, solar-powered garden light inserts, and some creativity. Start by removing the lids from the mason jars and inserting the solar-powered lights into the jars. You can add decorative elements like colored glass beads, seashells, or even fairy lights inside the jars to create a beautiful glow. Place these lanterns along pathways or hang them from tree branches to add a magical ambiance to your garden.
Installing solar string lights
Solar string lights are a versatile option when it comes to outdoor lighting. Whether you want to decorate your patio, pergola, or fence, these lights can be easily installed and add a cozy feel to your space. Simply hang the string lights where you want them, making sure the solar panel is exposed to sunlight. Solar string lights come in various lengths and can be found in different colors or styles, allowing you to customize the look of your outdoor area. With their low maintenance and energy-efficient nature, solar string lights are an excellent choice for illuminating your garden.
Fairy Lights
Wrapping fairy lights around trees
One of the easiest and most popular ways to use fairy lights in your garden is by wrapping them around trees. This creates a magical, twinkling effect that instantly transforms your outdoor space. Start by choosing a suitable tree with branches that can support the lights. You can either wrap the fairy lights around the trunk or drape them along the branches, depending on the size and shape of the tree. Make sure the lights are securely fastened and evenly distributed to achieve a whimsical glow that will enchant both you and your guests.
Creating outdoor chandeliers with fairy lights
For a more elegant and sophisticated look, consider creating outdoor chandeliers with fairy lights. This DIY project is surprisingly simple yet incredibly effective. Start by finding a sturdy base, such as a wire basket or an old hanging plant holder. Securely attach the fairy lights to the base, making sure they cascade down in an elegant manner. Hang the chandelier from a tree branch or a pergola and watch as the fairy lights create a dazzling display. This unique lighting feature will not only illuminate your outdoor space but also serve as a stunning centerpiece for your garden gatherings.
Making DIY fairy light lanterns
If you’re feeling crafty, try making your own fairy light lanterns to add a touch of whimsy to your garden. Start by collecting empty glass jars or containers of various sizes and shapes. Clean them thoroughly and remove any labels or adhesive residue. Insert a strand of fairy lights into each jar, making sure the battery pack is positioned outside the jar for easy access. You can further embellish the lanterns by wrapping ribbon, twine, or decorative wire around the jar’s mouth. Place these DIY fairy light lanterns on tables, hang them from tree branches, or line them along your garden steps to create a cozy and enchanting ambience.

Candle Lanterns
Hanging mason jar candle lanterns
Mason jars are not only versatile but also make excellent candle lanterns. To make hanging mason jar candle lanterns, you’ll need mason jars with lids, wire or twine, and candles. Start by punching a hole in the center of each mason jar lid. Then, thread a piece of wire or twine through the hole, creating a loop for hanging. Fill the jars with sand or small pebbles to stabilize the candles. Place the candles inside the jars, screw on the lids, and secure the wire or twine to a hook or tree branch. These lanterns will create a warm, flickering glow that adds a cozy and intimate atmosphere to your garden.
Making wood and glass candle lanterns
Wood and glass candle lanterns are a rustic and charming addition to any garden. To make your own, you’ll need wooden planks, glass panes, nails or screws, and candles. Start by constructing a box shape using the wooden planks, leaving one side open for the glass pane. Attach the glass pane to the wooden frame using nails or screws. Place a candle inside the lantern and light it for a beautiful glow. You can customize the lantern by adding decorative elements like handles or painting the wood in your desired color. These lanterns will not only provide warm and cozy lighting but also add a touch of natural elegance to your outdoor space.
Creating tin can candle holders
Tin can candle holders are a fun and creative way to repurpose materials while adding a unique lighting element to your garden. Start by collecting empty tin cans of various sizes. Remove any labels and sharp edges from the cans, and clean them thoroughly. Fill each tin can with water and place it in the freezer until the water freezes. This step will prevent the cans from denting while punching holes. Once the water is frozen, draw a design on the can, such as stars or hearts. Carefully use a hammer and a nail to punch holes along the drawn lines. Place a candle inside the can, light it, and watch as the candlelight illuminates the intricate patterns. Hang these tin can candle holders from tree branches or place them along your garden pathways for a charming and whimsical glow.
LED Strip Lights
Adding LED strip lights to pathways
Illuminate your garden pathways and create a safe and inviting atmosphere by adding LED strip lights. These lights are flexible and come in various lengths, allowing you to easily install them along the edges of your paths. Start by measuring the length of the pathway and cut the LED strip lights accordingly. Strip the adhesive backing and firmly press the lights onto the ground, following the path’s edge. Make sure the strip lights are securely attached and evenly spaced. The soft glow of the LED lights will guide you and your guests while adding a touch of elegance to your garden.
Installing LED strip lights beneath step risers
Create a stunning visual effect and improve safety by installing LED strip lights beneath your step risers. This technique not only adds an enchanting glow to your outdoor stairs but also prevents accidents by providing better visibility. Start by measuring the length of each step riser and cut the LED strip lights accordingly. Peel off the adhesive backing and attach the strip lights to the underside of each step riser, ensuring they are aligned and evenly spaced. Connect the lights to a power source, and you’ll have beautiful, softly lit stairs that will make your garden stand out.
Using LED strip lights in water features
Enhance the beauty of your garden’s water features by using LED strip lights. Whether you have a pond, fountain, or waterfall, these lights can create a stunning visual effect that will captivate both you and your guests. Start by placing the LED strip lights under the water feature’s edge or rim, ensuring they’re securely attached and won’t be submerged. The soft and colorful glow of the lights will illuminate the flowing water, adding a touch of magic to your garden. You can even experiment with different colors to create unique effects and set the desired mood.

Glow-in-the-Dark Paint
Painting garden ornaments with glow-in-the-dark paint
Add an element of surprise to your garden by painting your garden ornaments with glow-in-the-dark paint. This simple yet effective technique can transform ordinary objects into captivating focal points once the sun goes down. Choose garden ornaments like sculptures, gnomes, or stones and apply glow-in-the-dark paint to them using a brush or spray paint. Make sure to follow the instructions on the paint container for the best results. Place these ornaments strategically throughout your garden, and they’ll come alive with a mystical glow, creating a magical setting for evening gatherings or strolls.
Creating glowing stepping stones
Glow-in-the-dark stepping stones are not only functional but also add a whimsical touch to your garden. Start by choosing the shape and size of your stepping stones. You can either purchase pre-made concrete stepping stones or create your own using molds. Once you have the stepping stones, apply glow-in-the-dark paint or a glow-in-the-dark spray sealer to the surface. Make sure to follow the product instructions to achieve the best glow effect. Arrange these glowing stepping stones along your garden paths or create a pathway leading to a cozy seating area, and watch as the stones light your way in the darkness.
Using glow-in-the-dark paint on plant pots
Revitalize your garden plant pots by using glow-in-the-dark paint to create an eye-catching and magical display. Start by selecting a variety of different-sized plant pots, ensuring they are clean and dry. Apply a base coat of white paint to the pots, as this will enhance the glow-in-the-dark effect. Once the base coat is dry, you can start adding your desired design using glow-in-the-dark paint. Let your creativity shine by painting flowers, stars, or unique patterns on the pots. When night falls, these painted plant pots will come alive with a soft, radiant glow, casting an enchanting aura over your garden.
Fire Pit
Building a DIY fire pit
Creating a DIY fire pit in your garden is a fantastic way to add a warm and cozy gathering space. Start by choosing a suitable location for your fire pit. Clear the area of any flammable materials, ensuring it is a safe distance from buildings or trees. Dig a hole in the ground, approximately one foot deep, and line it with bricks or stones. Position the bricks or stones in a circle to form the walls of the fire pit. Make sure the bricks or stones are tightly packed together to prevent any movement. Fill the bottom of the pit with gravel for better drainage and place a metal grate over it. Add firewood to the pit and light it for a comforting fire that will bring friends and family together.
Adding decorative stones or glass to the fire pit
Enhance the visual appeal of your fire pit by adding decorative stones or glass to the bottom. This simple touch can elevate the aesthetic of the fire pit and create a mesmerizing display. Choose stones or tempered fire glass in colors that complement your garden theme. Spread a layer of stones or glass at the bottom of the fire pit, ensuring the layer is even and covers the entire area. When the fire is lit, the stones or glass will reflect the flames, creating a stunning visual effect that will captivate everyone. This addition also acts as a heat regulator, keeping the fire burning efficiently and evenly.
Installing a fire pit with built-in lighting
For a truly extraordinary fire pit experience, consider installing a fire pit with built-in lighting. These innovative fire pits combine functionality and aesthetics, allowing you to enjoy both warmth and visual appeal. Choose a fire pit design that includes built-in LED lighting along the edges or within the walls. The LED lights can be adjusted to different colors or lighting patterns, creating an enchanting ambiance. When the fire is lit, the combination of the flames and the LED lighting will create a stunning visual display that will amaze and delight both you and your guests.

Landscape Lighting
Installing uplights to highlight trees and plants
Uplighting is a popular technique used to highlight the beauty of trees and plants in your garden. By strategically placing uplights at the base of trees or shrubs, you can create dramatic shadows and bring attention to their unique shapes and textures. Start by selecting the trees or plants you want to highlight. Position the uplights at a slight distance from the base, angling them upward towards the foliage. Ensure the lights are securely fastened and hidden from direct view. The combination of the uplights and the dark night sky will create a captivating and picturesque scene that will breathe new life into your garden.
Adding downlights to illuminate pathways
For safe and practical lighting along your garden pathways, consider adding downlights. These lights are typically installed on the underside of overhanging structures such as eaves, pergolas, or trees. The downlights cast a focused beam of light onto the pathway, illuminating your way and ensuring visibility. Start by determining the best placement for the downlights, making sure they’re evenly spaced and provide sufficient coverage. Install the lights securely, and remember to position them at the right angle to avoid glare. The downlights not only enhance the safety of your pathways but also create a visually pleasing and inviting atmosphere.
Using spotlights to accentuate specific features
If you have specific features in your garden that you want to showcase, such as statues or water features, spotlights are the perfect lighting choice. Spotlights provide a focused and intense beam of light that draws attention to the desired area. Start by determining the features you want to accentuate. Install spotlights at a suitable distance from the feature, aiming them directly at the focal point. Make sure the lights are securely fixed and their beams are properly aligned. The spotlights will create a dramatic effect that adds depth and dimension to your garden, making your chosen features stand out in all their glory.
Paper Lanterns
Hanging paper lanterns from trees
Paper lanterns add a touch of elegance and a soft, diffused glow to your garden. Hanging them from trees creates a dreamy and romantic atmosphere that will enchant both you and your guests. Start by choosing a variety of different-sized paper lanterns and ensuring they are suitable for outdoor use. Attach a string or wire to each lantern, making sure it is securely fastened. Hang the lanterns from tree branches, staggering them at different heights to create visual interest. When the lanterns are lit, the delicate paper will diffuse the light, transforming your garden into a magical wonderland.
Creating floating paper lanterns for ponds or pools
For a truly enchanting sight, consider creating floating paper lanterns for your garden pond or pool. These lanterns add a touch of serenity and elegance to the water, creating a mesmerizing display. Start by choosing water-resistant paper lanterns that are specifically designed for floating. Insert a small LED light or a floating candle into each lantern, ensuring they are securely in place. Gently release the lanterns onto the surface of the water, watching as they gently float and cast a beautiful glow. The reflection of the lanterns on the water creates a picturesque scene that will make any evening in your garden unforgettable.
Making origami lanterns
Origami lanterns are a unique and creative way to add personalized lighting to your garden. These lanterns can be made using colored paper in various shapes, sizes, and designs. Start by selecting your preferred type of origami lantern and follow the instructions to fold and assemble it. You can experiment with different colors and patterns to create a vibrant and visually appealing display. Once the lanterns are complete, insert an LED light or a small candle inside them. Hang the origami lanterns from trees or place them along your garden pathway, and revel in the beauty of your handmade creations as they illuminate your garden.

DIY Mason Jar Lights
Creating mason jar pendant lights
Mason jar pendant lights are a trendy and charming addition to any garden. These lights add a rustic and vintage touch while providing warm and inviting illumination. To create mason jar pendant lights, you’ll need mason jars, pendant light kits, and ceiling hooks. Start by removing the lids from the mason jars and threading the pendant light kits through the jar openings. Follow the kit’s instructions to properly install the wiring and light bulb. Attach the ceiling hooks in the desired location and hang the mason jar pendant lights from them. Adjust the length of the cord to achieve the desired height. These unique lights will create a cozy and nostalgic ambiance in your garden.
Making mason jar solar lights
Combine the charm of mason jars with the energy efficiency of solar lights by making your own mason jar solar lights. These lights are perfect for adding a cozy and whimsical glow to your garden without the need for electricity. Start by removing the lids from the mason jars and painting them in a color of your choice. Insert solar-powered garden light inserts into the jars and place the painted lids back on top. Position the mason jar solar lights in a sunny location and allow the solar panels to absorb sunlight during the day. At dusk, the lights will automatically turn on, casting a soft and comforting glow throughout your garden.
Building mason jar sconces
Mason jar sconces are a stylish and functional way to add lighting to your garden walls or fences. These sconces create a warm and welcoming atmosphere while utilizing the charm of mason jars. To build mason jar sconces, you’ll need mason jars, wall-mounted brackets, and suitable light fixtures. Start by attaching the wall-mounted brackets to the desired location, making sure they are securely fastened. Insert the light fixtures into the mason jars, leaving the cords hanging down. Attach the mason jars to the wall-mounted brackets, and adjust the length of the cords as needed. When the lights are turned on, the mason jars will emit a soft and comforting glow that adds a touch of rustic elegance to your garden.
Globe String Lights
Stringing globe lights across outdoor seating areas
Globe string lights are a versatile and visually appealing option for illuminating your outdoor seating areas. These lights consist of a string with evenly spaced globes or bulbs, creating a beautiful and enchanting display. Simply string the lights across your outdoor seating area, ensuring they are securely fastened and evenly distributed. You can drape them overhead, creating a canopy effect, or hang them along fences or pergolas. When the lights are turned on, the soft and warm glow emitted by the globes will create a cozy and inviting atmosphere, perfect for enjoying the outdoors with friends or family.
Decorating pergolas with globe string lights
Pergolas provide an ideal structure for hanging and showcasing globe string lights. By decorating your pergola with these lights, you’ll create a captivating and romantic ambiance perfect for cozy evenings in your garden. Start by wrapping the lights around the vertical posts or draping them across the top of the pergola, allowing the strings to hang down slightly. Secure the lights in place using clips or hooks, making sure they are evenly spaced. The soft light emitted by the globe bulbs will cast a warm, welcoming glow throughout your pergola, transforming it into an intimate and inviting space.
Using globe string lights to highlight garden structures
Globe string lights can also be used to highlight and accentuate garden structures such as arches, gazebos, or trellises. By strategically placing these lights around the structures, you’ll create a radiant and enchanting effect that beautifully elevates your garden decor. Start by wrapping the lights around the structures, ensuring they are securely fastened and evenly distributed. You can choose to have the lights follow the shape of the structure or create a cascading effect. When the lights are turned on, the rounded globes will emit a warm and gentle glow that enhances the aesthetic appeal of your garden structures, making them truly stand out.
By utilizing these popular DIY garden lighting techniques, you can transform your outdoor space into a magical and inviting sanctuary. Whether you prefer the energy efficiency of solar lighting, the enchantment of fairy lights, the allure of candle lanterns, the versatility of LED strip lights, the glowing effect of glow-in-the-dark paint, the warmth of a fire pit, the beauty of landscape lighting, the charm of paper lanterns, the versatility of mason jar lights, or the elegance of globe string lights, there is a DIY lighting solution for every garden style and preference. Embark on these projects and let your garden shine with a personalized and enchanting glow that will delight both you and your guests.


