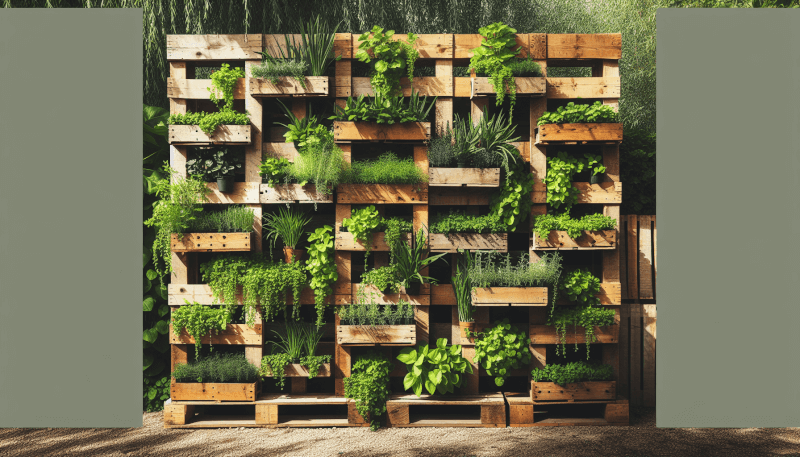
Are you looking for creative ways to spruce up your garden while also keeping sustainability in mind? Look no further! This article brings you 10 unique gardening projects that you can easily create using recycled materials. From vertical planters made out of old shoe organizers to colorful mosaic flower pots made from broken tiles, these DIY projects will not only add a personal touch to your garden but also help reduce waste. So, roll up your sleeves and get ready to transform your outdoor space into a green oasis with these environmentally-friendly projects.
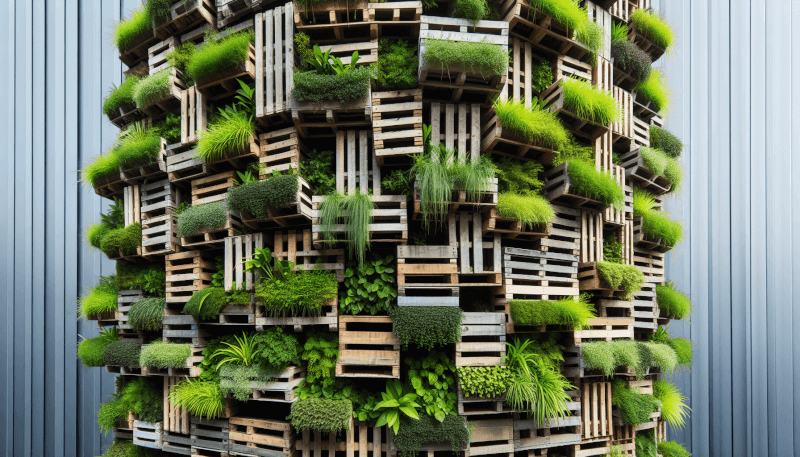
1. Vertical Garden from Pallets
If you’re looking for a creative way to add some greenery to your outdoor space, a vertical garden made from pallets is the perfect project for you. Not only is it a fantastic way to upcycle old pallets, but it also allows you to maximize your garden space by growing plants vertically. Here’s what you’ll need:
Materials needed:
- Pallets
- Landscape fabric
- Staple gun
- Potting soil
- Plants or seeds of your choice
Step-by-step instructions:
- Start by preparing your pallets. Remove any nails or splinters and give them a good cleaning.
- Cut a piece of landscape fabric to fit the back of each pallet. This will prevent soil from falling out while still allowing water to drain through.
- Use a staple gun to secure the landscape fabric to the back of the pallet, ensuring that it is taut and covers the entire surface.
- Fill each section of the pallet with potting soil, leaving enough space for the plants or seeds to be inserted.
- Gently plant your chosen plants or seeds into the pockets of soil, being careful not to overcrowd them.
- Once all the plants are in place, water the pallet thoroughly, ensuring that the soil is evenly moist.
- Hang the pallet on a sturdy wall or fence, making sure it is securely fastened.
- Monitor the moisture levels and water as needed to keep your vertical garden thriving.
Tips and tricks:
- Choose plants that are suitable for vertical gardening, such as trailing vines or compact herbs.
- Consider adding a layer of mulch to help retain moisture and prevent weed growth.
- Place your vertical garden in a location that receives adequate sunlight for the specific plants you’ve chosen.
2. Tire Planter
Turn old tires into unique planters and give your garden a vibrant and eco-friendly touch. This project is not only a great way to repurpose old tires but also adds a pop of color to your outdoor space. Here’s what you’ll need:
Materials needed:
- Old tires
- Spray paint
- Potting soil
- Plants or seeds of your choice
Step-by-step instructions:
- Start by cleaning the tires thoroughly and ensuring they are free from any dirt or debris.
- Apply a coat of spray paint to the exterior of the tires in the color of your choice. Be sure to choose a paint that is safe for outdoor use and won’t harm the plants.
- Allow the paint to dry completely before moving on to the next step.
- Fill each tire with potting soil, leaving enough space for the plants or seeds.
- Plant your chosen plants or seeds in the soil, being mindful of spacing and plant requirements.
- Water the plants thoroughly after planting, ensuring that the soil is evenly moist.
- Place the tire planters in your desired location, ensuring they are stable and won’t roll or tip over.
Tips and tricks:
- Consider using different sizes and colors of tires to create a visually stunning display.
- To add extra height, stack multiple tires on top of each other, securing them with adhesive or heavy-duty bolts.
- Use plants that are suited to container gardening and don’t require a large amount of space.
3. Plastic Bottle Herb Garden
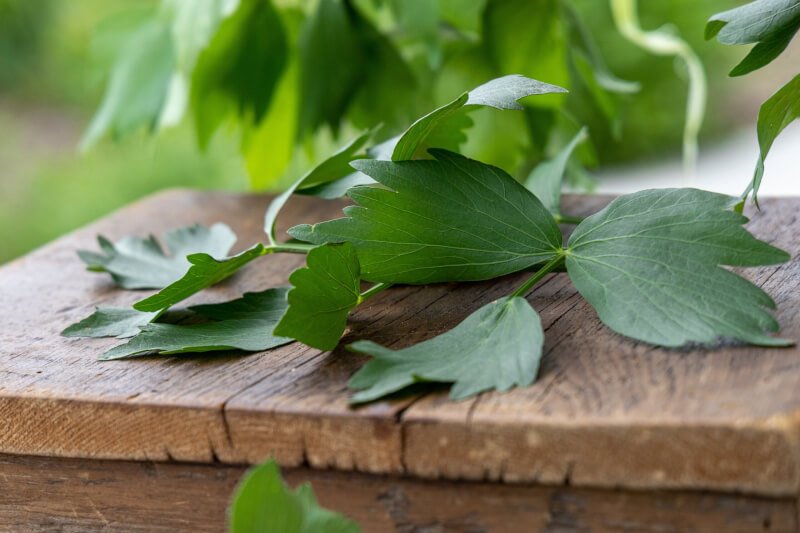
Want fresh herbs on hand but don’t have a lot of space? Look no further than a plastic bottle herb garden. This project makes use of empty plastic bottles and allows you to grow your favorite herbs right in your kitchen or balcony. Here’s what you’ll need:
Materials needed:
- Empty plastic bottles (any size)
- Utility knife or scissors
- Potting soil
- Herb seeds or small herb plants
- Watering can or spray bottle
Step-by-step instructions:
- Start by cleaning and removing any labels from your plastic bottles.
- Using a utility knife or scissors, carefully cut off the top portion of each bottle. Ensure that the remaining bottom portion is deep enough to accommodate the roots of your chosen herbs.
- Fill each bottle with potting soil, leaving a small space at the top for watering.
- Plant your herb seeds or small herb plants in the soil, following the instructions on the seed packet or plant label.
- Water the soil gently, being careful not to oversaturate.
- Place your plastic bottle herb garden near a sunny window or balcony where it will receive adequate sunlight.
- Monitor the moisture levels and water as needed to keep the soil evenly moist.
- Harvest your herbs as they grow and enjoy fresh and flavorful additions to your meals.
Tips and tricks:
- To create a self-watering system, add a small hole near the bottom of each bottle and place a wick, such as a cotton string, through the hole. Place the other end of the wick in a container filled with water, providing a constant supply of moisture to the plants.
- Label each bottle to keep track of the herbs you’ve planted.
- Customize your plastic bottles by painting or decorating them for a personalized touch.
4. Glass Jar Terrarium
Create your own miniature ecosystem with a beautiful and low-maintenance glass jar terrarium. This project allows you to bring a piece of nature indoors and requires minimal care. Here’s what you’ll need:
Materials needed:
- Glass jar or container with a lid
- Gravel or small rocks
- Activated charcoal
- Potting soil
- Small plants suitable for terrariums
- Decorative elements (optional)
Step-by-step instructions:
- Start by cleaning your glass jar or container thoroughly, ensuring it is free from any dirt or residues.
- Add a layer of gravel or small rocks at the bottom of the jar. This will help with drainage and prevent water from accumulating at the roots of the plants.
- On top of the gravel, add a thin layer of activated charcoal. This acts as a filter and helps to keep the terrarium fresh and free from odors.
- Add a layer of potting soil on top of the charcoal, ensuring it is deep enough to accommodate the roots of your chosen plants.
- Plant your small plants in the soil, arranging them in a visually appealing way. Be mindful of spacing and plant requirements.
- If desired, add decorative elements such as small figurines or moss to enhance the visual appeal of the terrarium.
- Mist the terrarium lightly with water to provide moisture to the plants. Be careful not to over-water, as this can lead to rotting or mold.
- Place the lid on the jar to create a miniature greenhouse effect. This will help retain moisture and create a self-sustaining environment.
Tips and tricks:
- Choose plants that are well-suited to the conditions within a closed terrarium, such as ferns or mosses.
- Place your glass jar terrarium in an area with indirect sunlight to prevent overheating and ensure optimal plant growth.
- Monitor the moisture levels and mist the terrarium as needed, taking care not to saturate the soil.
5. Tin Can Planters
Give your garden a rustic and charming look with tin can planters. This project allows you to repurpose empty tin cans and turn them into delightful containers for your favorite plants. Here’s what you’ll need:
Materials needed:
- Empty tin cans
- Hammer and nails
- Potting soil
- Plants or seeds of your choice
Step-by-step instructions:
- Start by cleaning and removing any labels from your tin cans. Ensure that there are no sharp edges.
- Using a hammer and nails, carefully puncture several drainage holes in the bottom of each tin can.
- Fill each tin can with potting soil, leaving enough space for the plants or seeds.
- Plant your chosen plants or seeds in the soil, being mindful of spacing and plant requirements.
- Water the plants thoroughly after planting, ensuring that the soil is evenly moist.
- Place the tin can planters in your garden, on a windowsill, or hang them from a fence or wall using wire or twine.
Tips and tricks:
- Create a whimsical display by painting the tin cans in vibrant colors or adding decorative elements such as ribbons or stencils.
- Cluster several tin can planters together to create a visually appealing arrangement.
- Ensure that the tin cans are clean and free from any sharp edges to prevent injury.
6. Egg Carton Seed Starters
Start your garden from scratch with egg carton seed starters. This simple and eco-friendly project allows you to give your seedlings a head start in a biodegradable container. Here’s what you’ll need:
Materials needed:
- Cardboard egg cartons
- Potting soil
- Seeds of your choice
- Watering can or spray bottle
Step-by-step instructions:
- Cut the lid off the egg carton and set it aside. This will serve as a tray to catch any excess water.
- Fill each section of the egg carton with potting soil, leaving enough space for the seeds.
- Plant your chosen seeds in the soil, following the instructions on the seed packet regarding planting depth and spacing.
- Water the soil gently using a watering can or spray bottle, ensuring that it is evenly moist.
- Place the egg carton seed starters in a sunny location or use a grow light to provide adequate light for the seedlings.
- As the seedlings grow, ensure that they are well-watered and transplant them to larger containers or your garden when they are ready.
Tips and tricks:
- Consider labeling each section of the egg carton to keep track of the seeds you’ve planted.
- Once the seedlings are ready to be transplanted, simply cut each section of the egg carton and plant it directly into the soil, as the cardboard will naturally decompose.
- Opt for organic seeds to ensure a more sustainable gardening practice.
7. Wine Bottle Watering System
Keep your plants hydrated with a clever and eco-friendly wine bottle watering system. This project repurposes empty wine bottles into efficient self-watering devices, ensuring that your plants receive the right amount of moisture. Here’s what you’ll need:
Materials needed:
- Empty wine bottles
- Corks or stoppers
- Small drill or cork drill bit
- Watering can or hose
Step-by-step instructions:
- Start by cleaning and removing any labels from your wine bottles.
- Using a small drill or cork drill bit, create a hole in the cork or stopper that is wide enough for water to flow through.
- Fill the wine bottle with water, leaving some space at the top to prevent overflow.
- Insert the cork or stopper into the bottle, ensuring that it fits snugly and forms a tight seal.
- Dig a hole in the soil near your plant, deep enough to accommodate the wine bottle.
- Place the wine bottle upside down into the hole, with the cork or stopper facing downwards.
- Gently press the soil around the wine bottle to secure it in place.
- The water will slowly seep out through the cork or stopper, providing a consistent supply of moisture to your plant.
Tips and tricks:
- Use this watering system for plants that have specific watering needs, such as those that prefer consistently moist soil.
- Monitor the water levels in the wine bottles regularly and refill as needed.
- Adjust the size of the hole in the cork or stopper to control the flow of water, depending on the plant’s requirements.
8. CD Case Greenhouse
Give your seedlings the perfect environment to thrive with a CD case greenhouse. This project repurposes old CD cases into mini greenhouses that provide optimal light and humidity for your tiny plants. Here’s what you’ll need:
Materials needed:
- Empty CD cases
- Clear tape
- Potting soil
- Seeds of your choice
- Watering can or spray bottle
Step-by-step instructions:
- Begin by cleaning your CD cases and ensuring that they are free from scratches or cracks.
- Open the CD case and place a layer of potting soil in the bottom, ensuring it is deep enough to accommodate the seeds.
- Plant your chosen seeds in the soil, following the instructions on the seed packet regarding planting depth and spacing.
- Gently water the soil using a watering can or spray bottle, ensuring that it is evenly moist.
- Close the CD case and seal it with clear tape to create a miniature greenhouse.
- Place the CD case greenhouse near a sunny window or use a grow light to provide adequate light for the seedlings.
- Open the CD case occasionally to allow for air circulation and to prevent mold or mildew from forming.
- As the seedlings grow, transplant them to larger containers or your garden when they are ready.
Tips and tricks:
- Label each CD case to keep track of the seeds you’ve planted.
- Consider using a variety of CD cases to create an eye-catching display.
- Be cautious not to overwater the seedlings, as the closed environment can lead to excess moisture.
9. Repurposed Shoe Organizer Herb Garden
Turn an old shoe organizer into a practical and space-saving herb garden. This project allows you to repurpose an item that would otherwise end up in the landfill, while also providing you with fresh herbs for culinary delight. Here’s what you’ll need:
Materials needed:
- Repurposed shoe organizer with pockets
- Potting soil
- Herb plants or seeds
- Watering can or spray bottle
Step-by-step instructions:
- Clean the shoe organizer thoroughly, ensuring that it is free from any dirt or residues.
- Fill each pocket of the shoe organizer with potting soil, leaving enough space for the plants or seeds.
- Plant your chosen herb plants or seeds in each pocket, being mindful of spacing and plant requirements.
- Water the soil gently, ensuring that it is evenly moist.
- Hang the shoe organizer herb garden in a location that receives adequate sunlight for the specific herbs you’ve chosen.
- Water the plants regularly, monitoring the moisture levels to ensure optimal growth.
- Harvest your herbs as they mature and enjoy the fresh flavors in your favorite recipes.
Tips and tricks:
- Group herbs with similar watering and sunlight requirements together in the shoe organizer for easier care.
- Label each pocket to keep track of the herbs you’ve planted.
- Consider using a shoe organizer with clear pockets, allowing you to easily see the growth progress of your herbs.
10. Newspaper Seedling Pots
Reduce waste and create biodegradable seedling pots with newspaper. This project allows you to start your plants from seeds without the need for plastic or expensive planters. Here’s what you’ll need:
Materials needed:
- Newspaper sheets
- Empty can or cylindrical object
- Potting soil
- Seeds of your choice
- Watering can or spray bottle
Step-by-step instructions:
- Start by cutting a sheet of newspaper into a square, approximately double the size of your desired pot.
- Place an empty can or cylindrical object in the center of the square.
- Fold one corner of the square over the can, pressing it down firmly.
- Continue folding the remaining corners of the square over the can, creating a pot shape.
- Tuck the excess newspaper into the bottom of the pot, securing it in place.
- Carefully remove the can from the center of the pot, leaving the newspaper pot intact.
- Fill each newspaper pot with potting soil, leaving enough space for the seeds.
- Plant your chosen seeds in the soil, following the instructions on the seed packet regarding planting depth and spacing.
- Water the soil gently using a watering can or spray bottle, ensuring that it is evenly moist.
- Place the newspaper seedling pots in a sunny location or use a grow light to provide adequate light for the seedlings.
- As the seedlings grow, ensure that they are well-watered and transplant them to larger containers or your garden when they are ready.
Tips and tricks:
- When transplanting the seedlings, simply place the entire newspaper pot into the soil, as it will naturally decompose.
- Consider using colorful newspaper sections to add visual appeal to your seedling pots.
- Be cautious not to overwater the seedlings, as the newspaper pots may absorb and retain moisture.
These 10 unique DIY gardening projects using recycled materials are not only fun and creative but also make a positive impact on the environment. So why not embark on these eco-friendly projects and add a touch of green to your life? Happy gardening!
